Creating a project and proposals
You may want to create a project for an existing client or for a lead. If it is from a lead, go to the lead. To do this, you will need to find it in the pipeline section. This can be found in the black left-hand menu. Once you're looking at your pipeline, go to the right hand side and find the search box - type in the lead name to find it there.
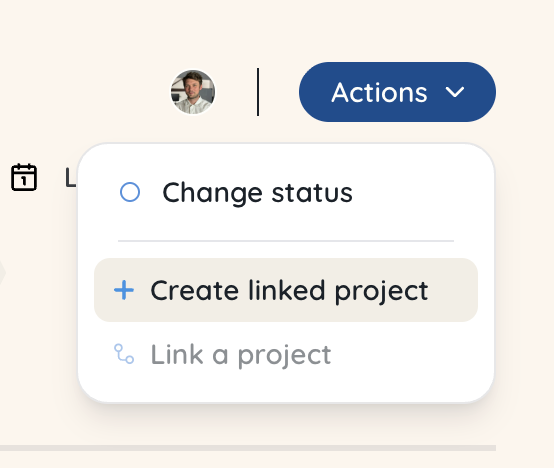
 Once you're in your lead, navigate to the right hand side and click ‘Actions’. This will bring up a dropdown and from here you click ‘+ Create linked project’.
 If you’re creating a project for an existing organisation or client, go to ‘Projects’ in the black left-hand menu and then click on the blue Actions button to bring up the dropdown and select ‘+ Create new project’.
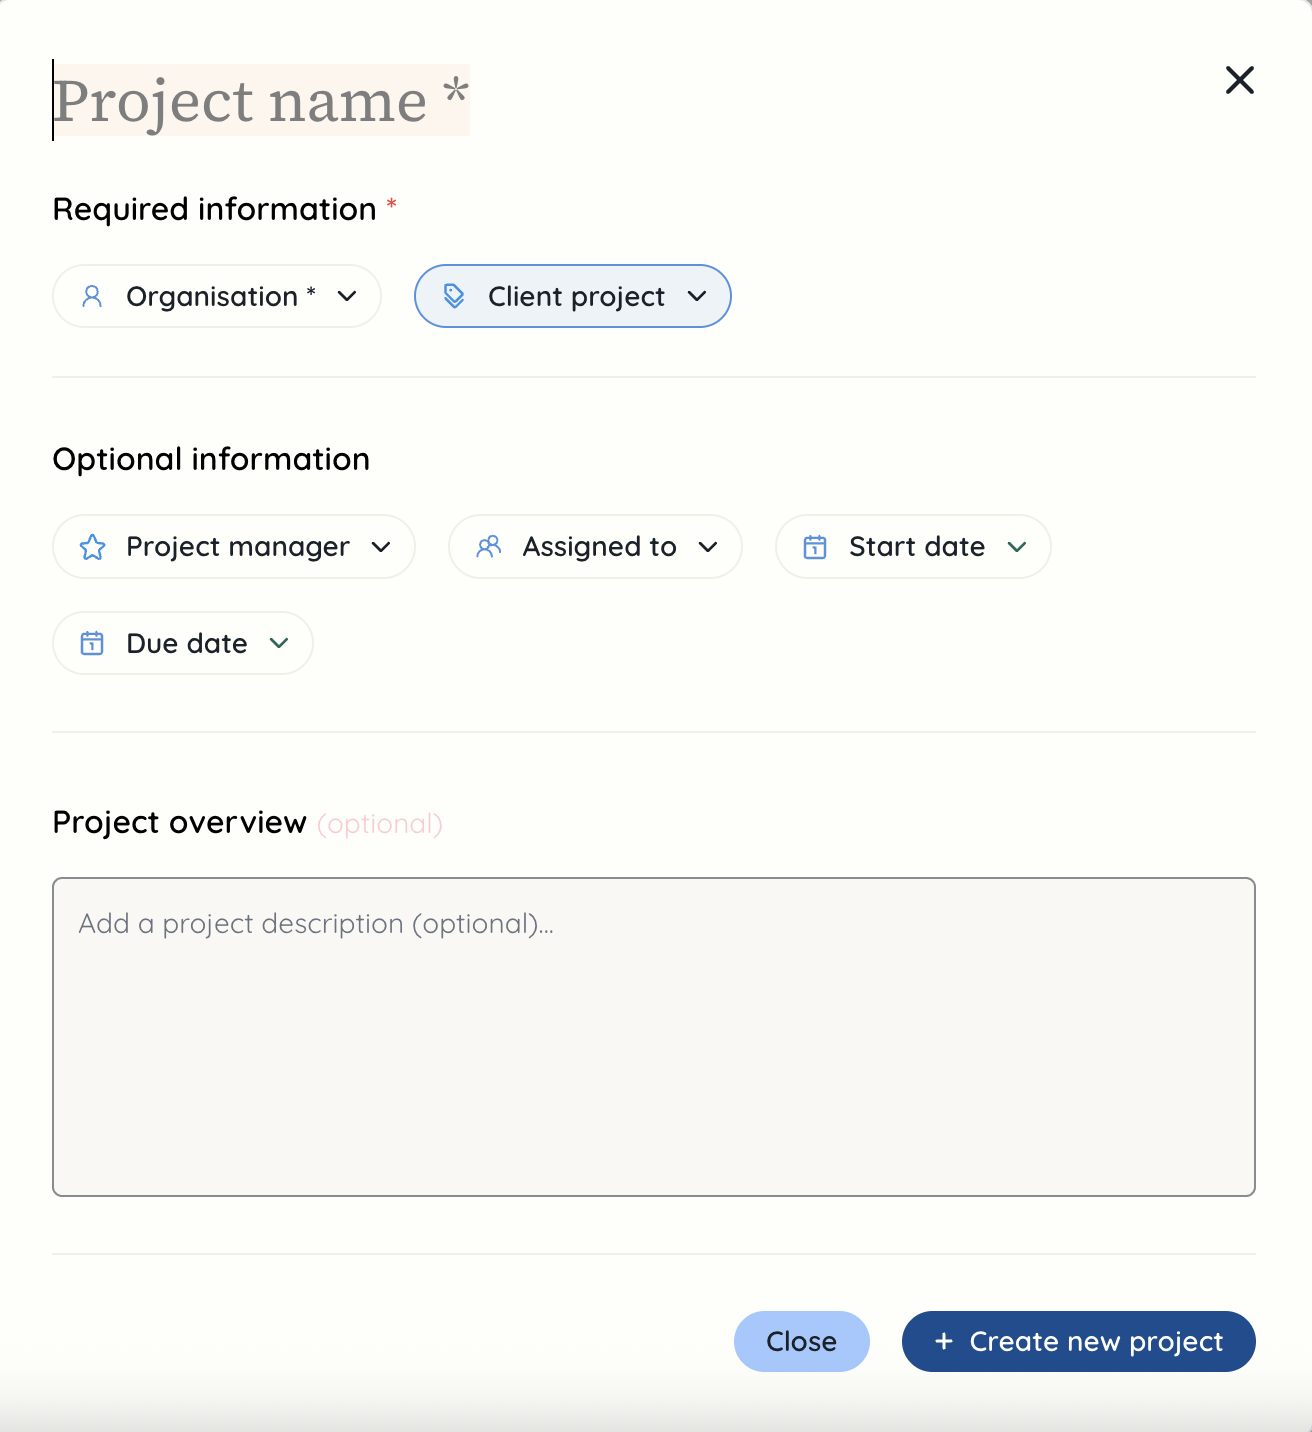
 Both ways of creating a project will bring up a modal where you can enter information about the project. There is limited required information as the aim is to get started on this quickly, and you can always come back to it to add more information. For example, you may not know the due date or who you want the project manager to be.
If you want to create an internal project, you can select your own agency as the organisation and where it says ‘Client project’, you can select this and change it to a different project type such as admin or marketing.
 Once you create the project, it will take you to the project overview page.
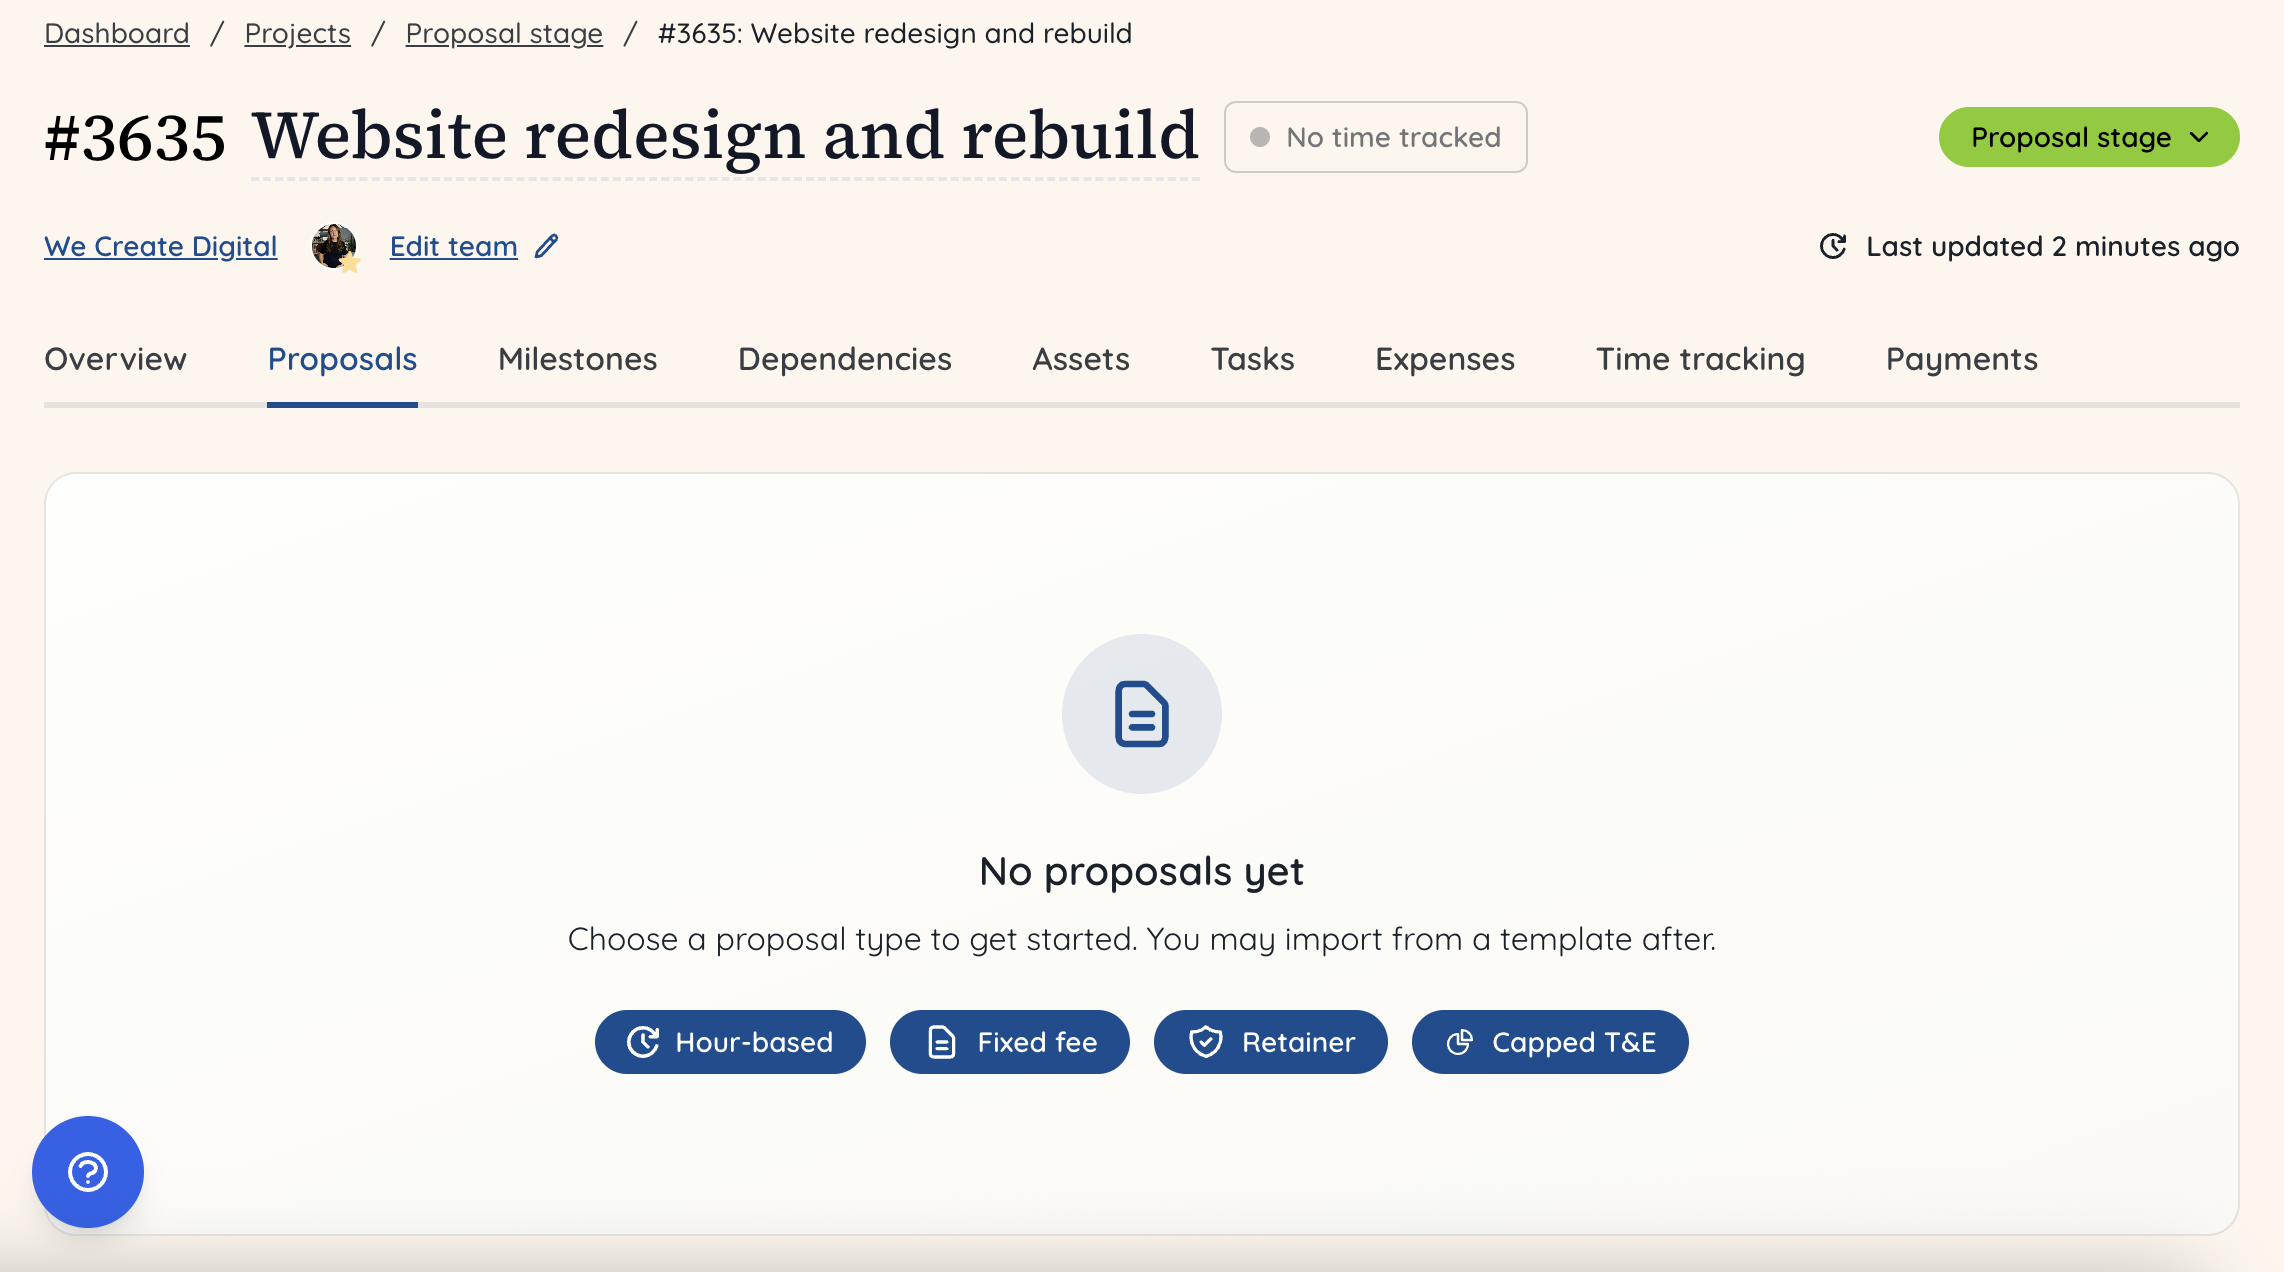
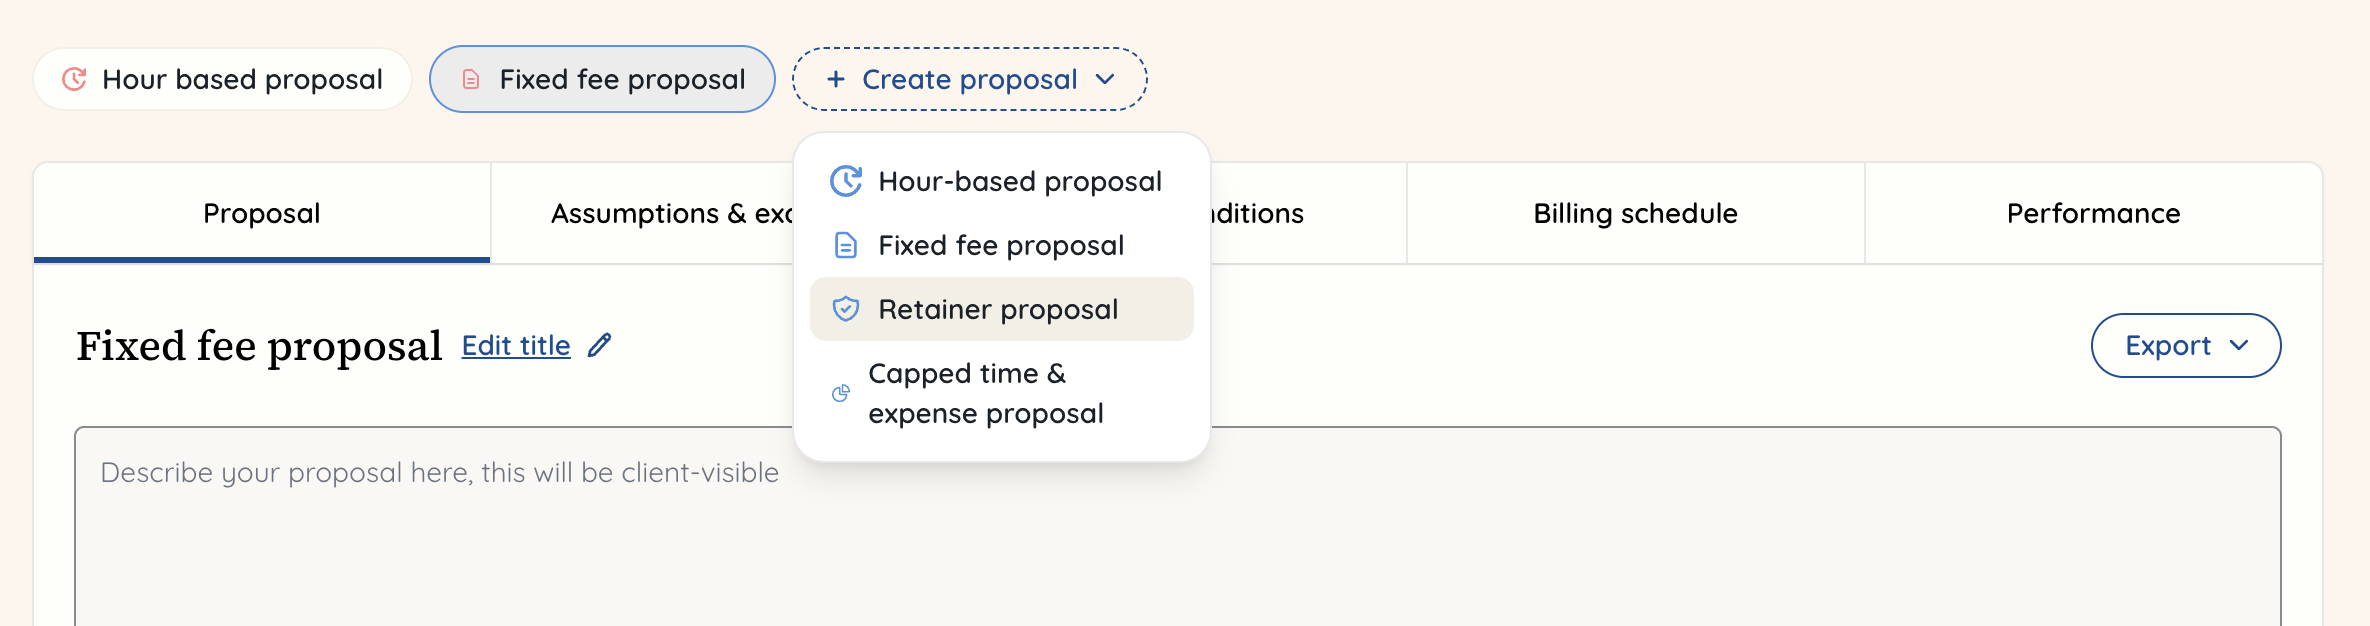
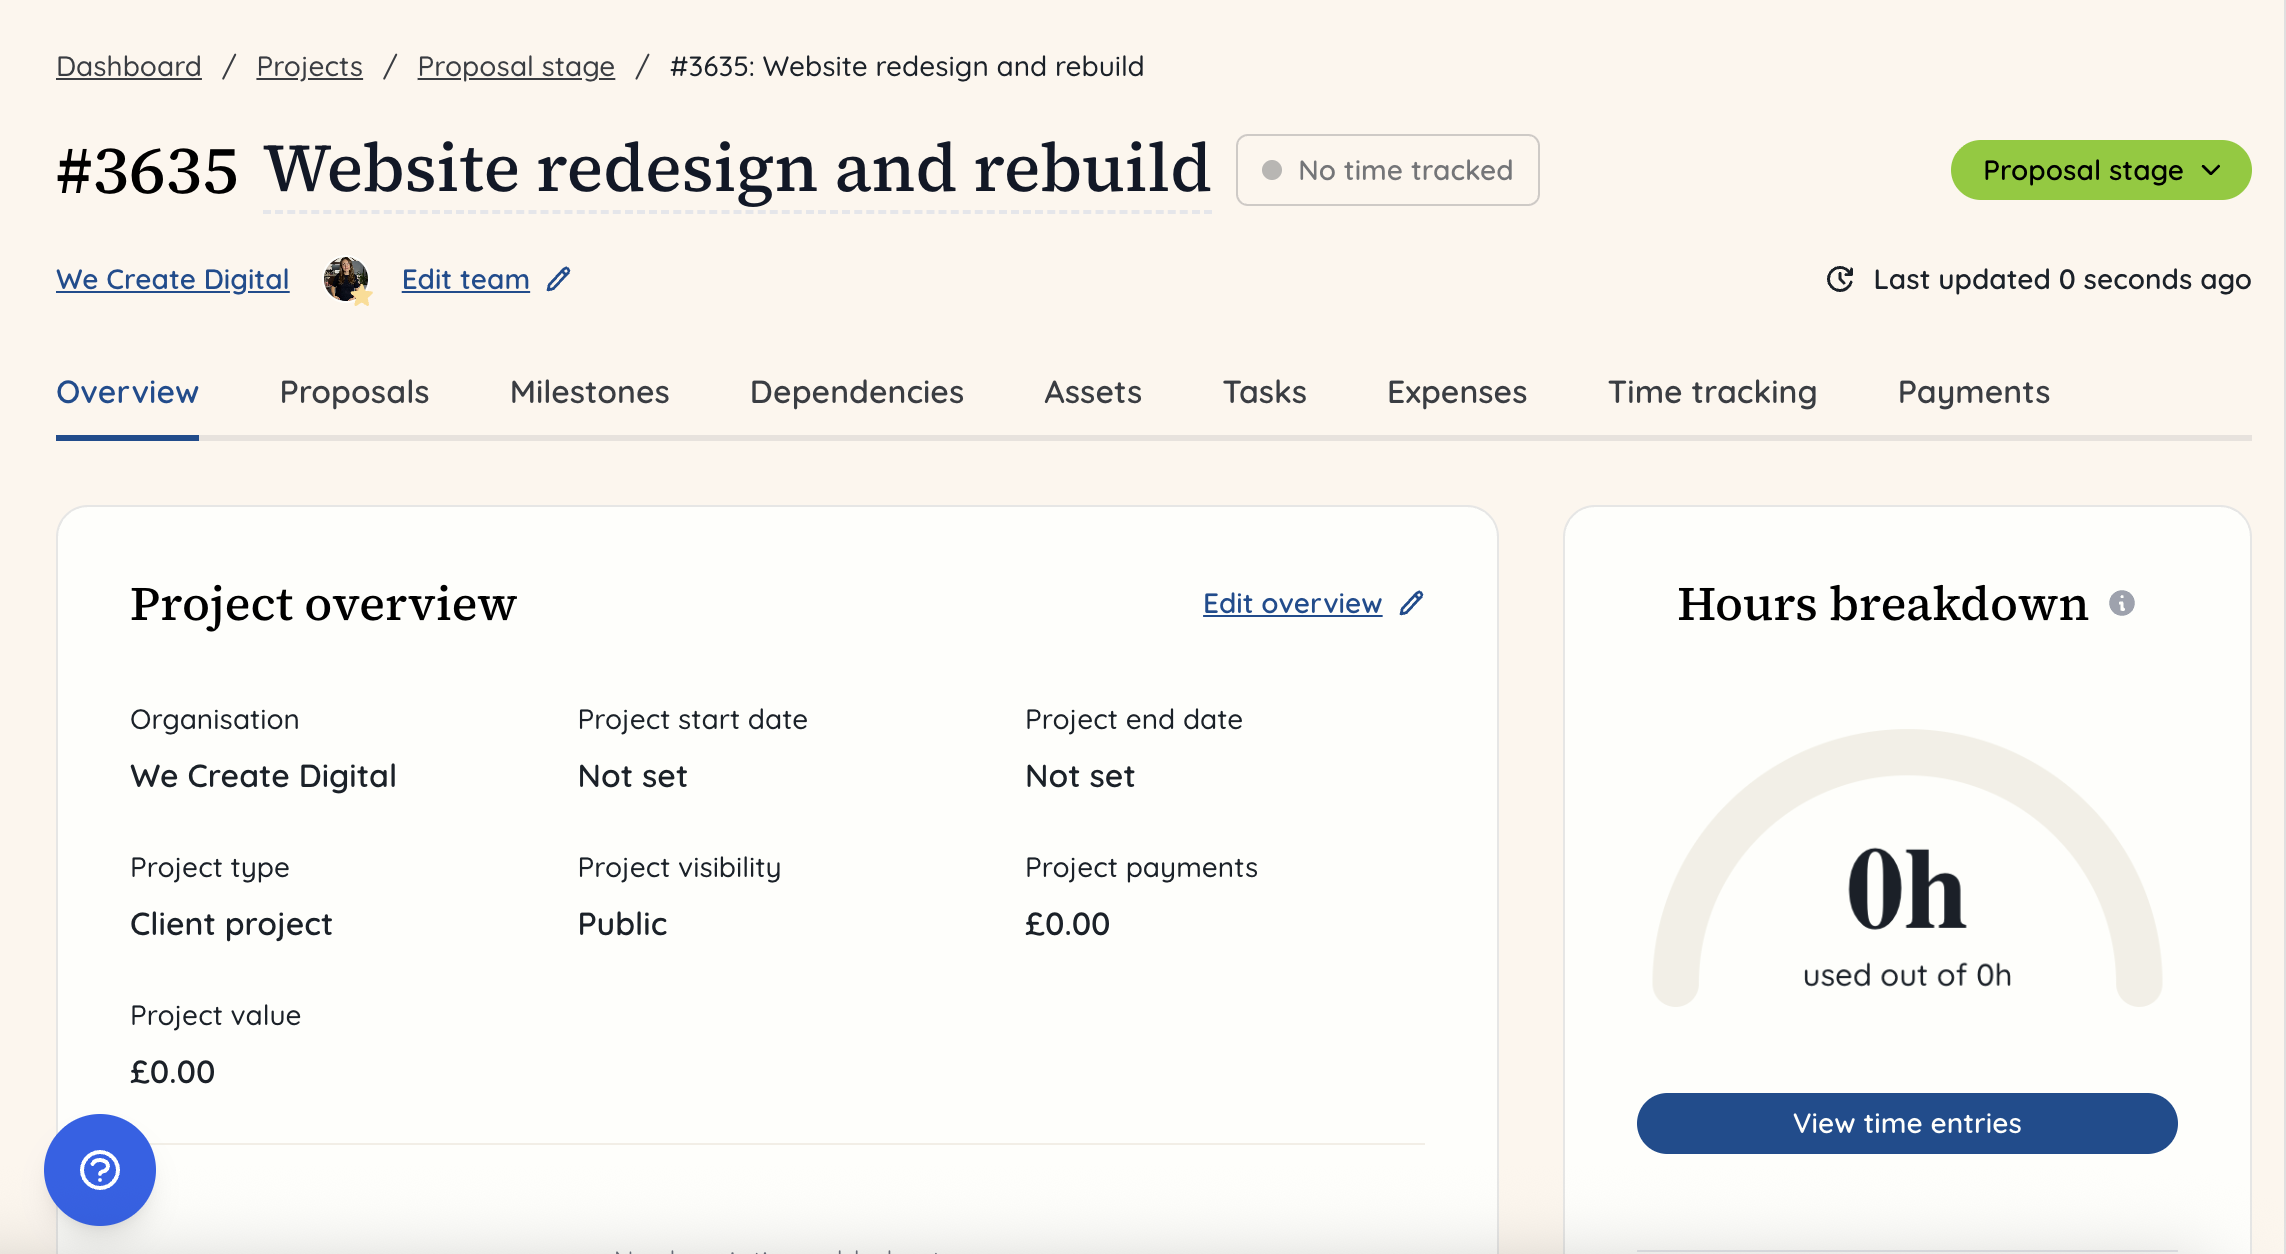 From here, you want to go to the ‘Proposals’ tab in order to start building out your proposal or SOW. Now you can select the type of proposal you need to create:
-
Hour-based
-
Fixed fee
-
Retainer
-
Capped time and expense
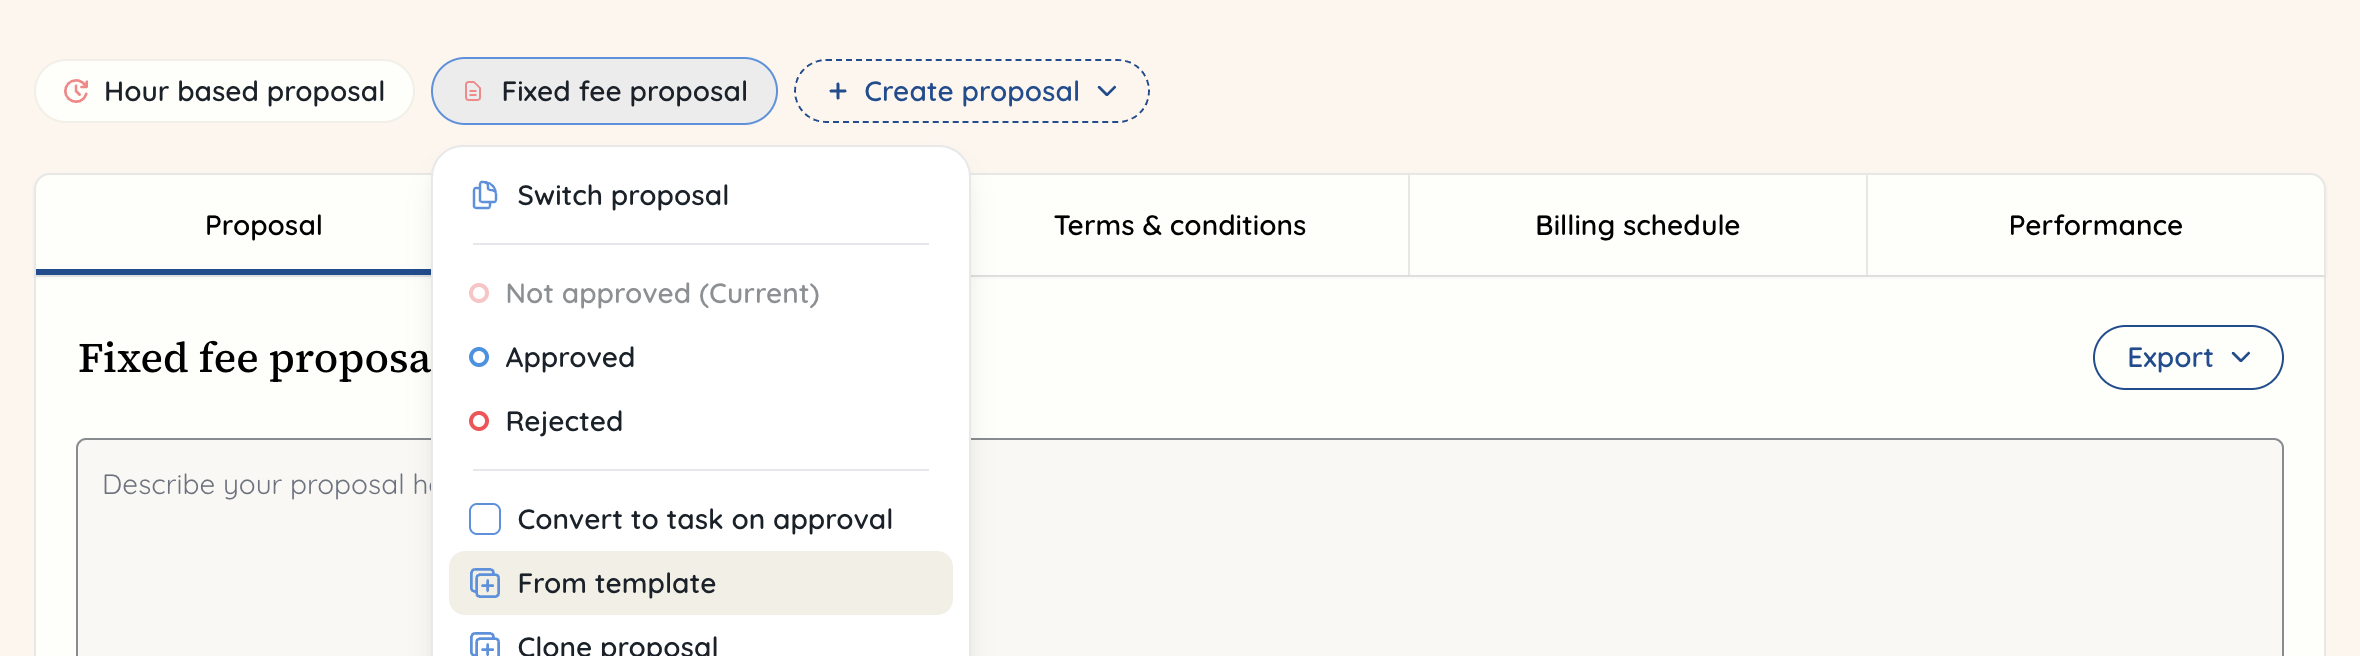
Please note, if you have created a proposal template already, you can add this to the proposal once you have chosen the proposal type.
 You click on the proposal name and then select ‘from template’
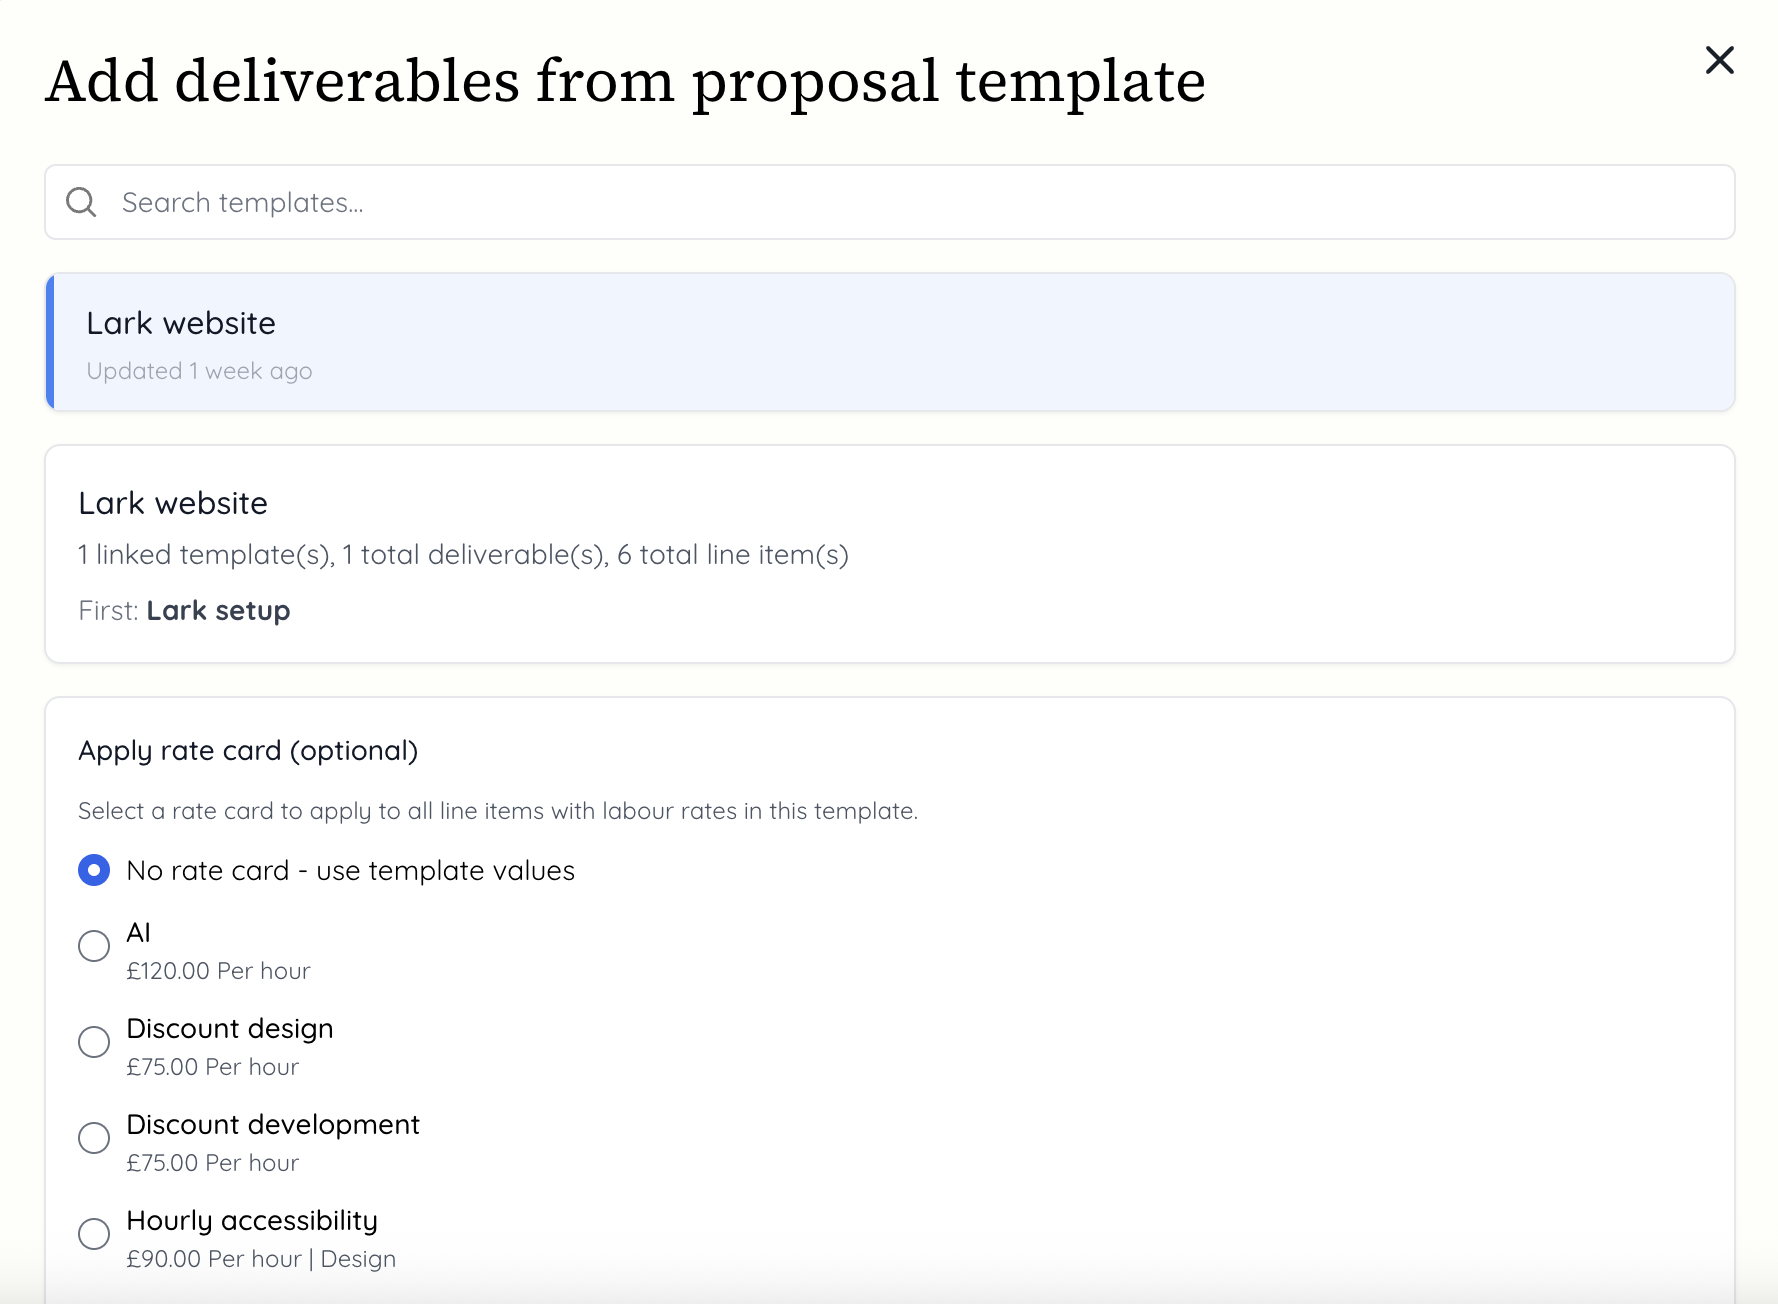
 Your templates will appear and you can then select one. It will show you how many deliverables and line items are in this and you can apply the rate card from the template or choose a different one at this point. Once you’re happy with your selection, click ‘Insert template’.
 Once you have created the proposal, you can add an overview - this will be visible to the client when you share it. You can make it as long as you like, but you can also add details in the deliverables.
Please note, the following steps show how to add content if it is a hour-based proposal. A lot of the steps are largely the same for all proposal types, but there are some differences around the pricing and if there is a time period for the proposal. To see these differences, scroll to the end of this guide.
Next, you should start adding deliverables. To do this, click below the overview where it says ‘+ Add deliverable’.
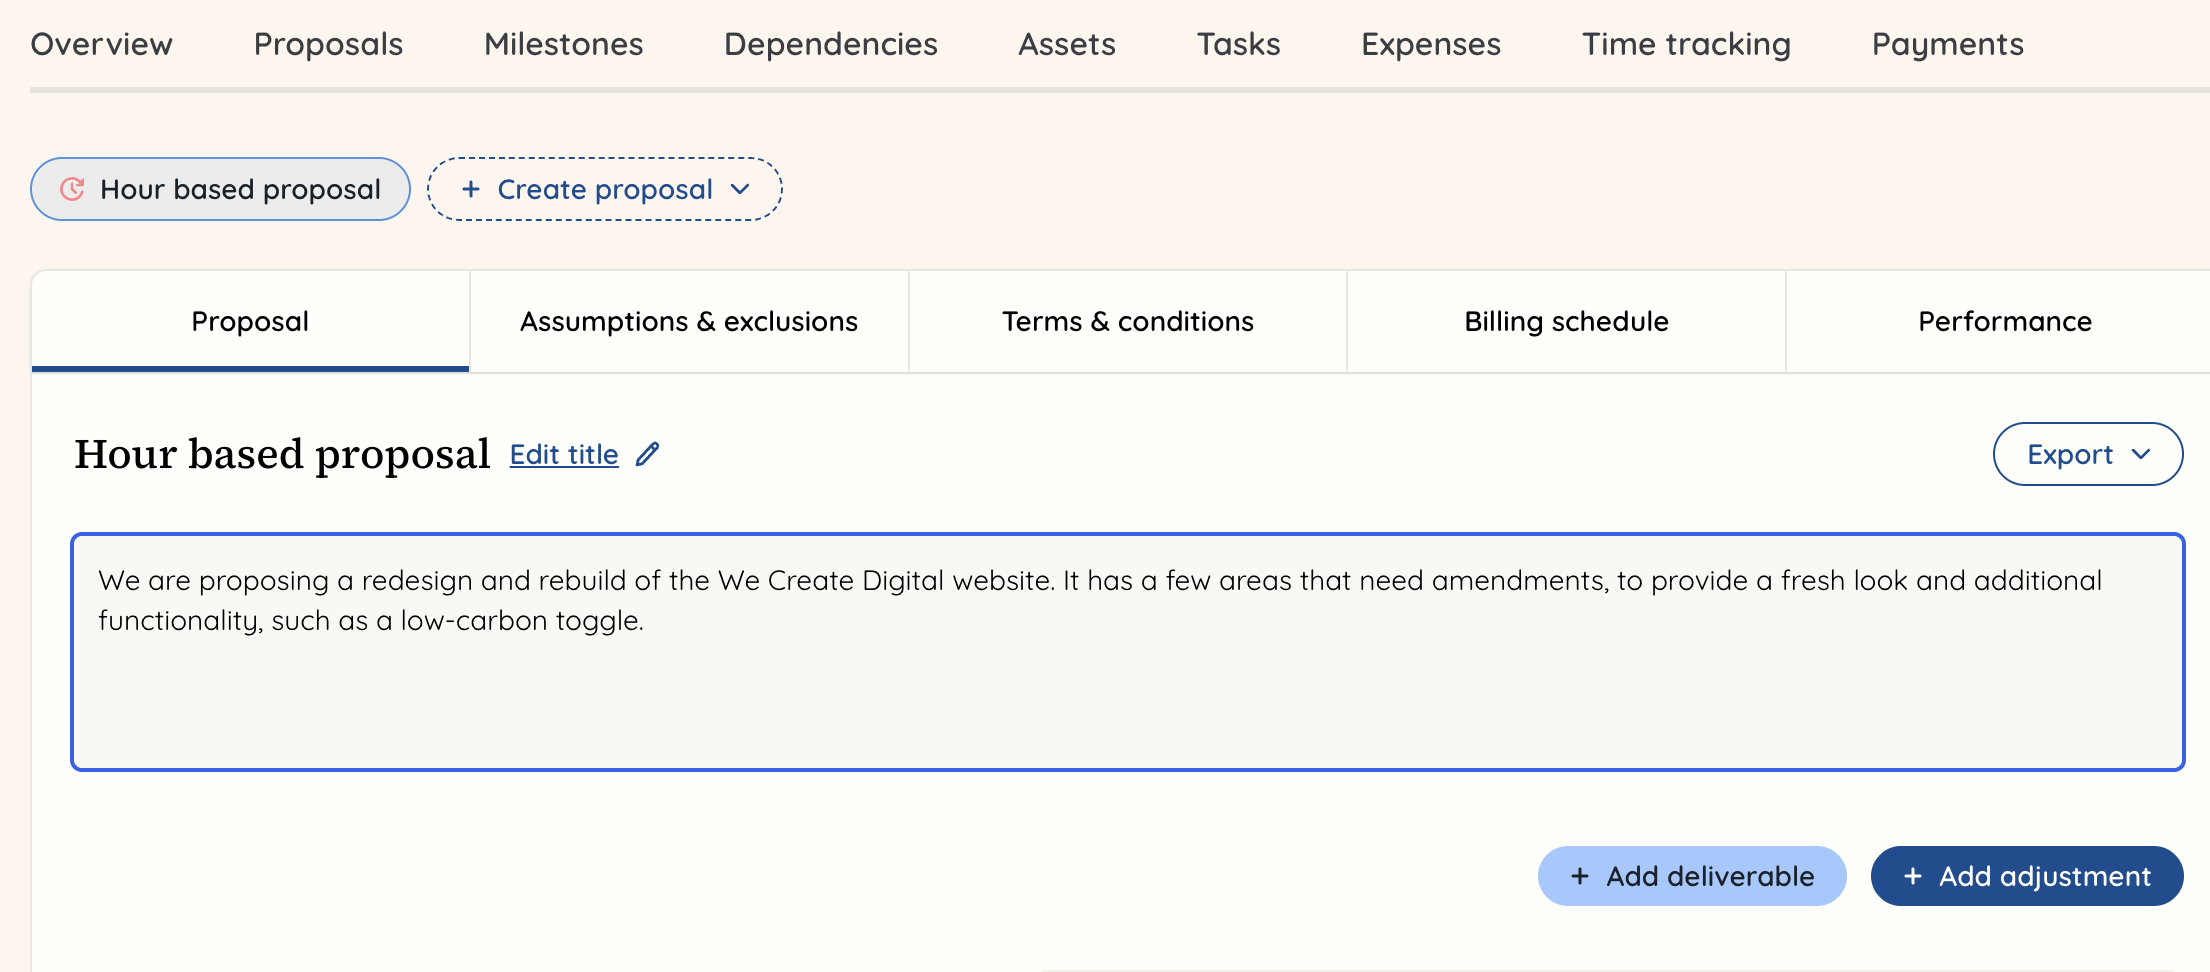
You can choose to add a deliverable from scratch or from a template.

Your deliverable is a top level item, which is made up of line items. You can rename the deliverable, add a description to it and then start adding line items to it.
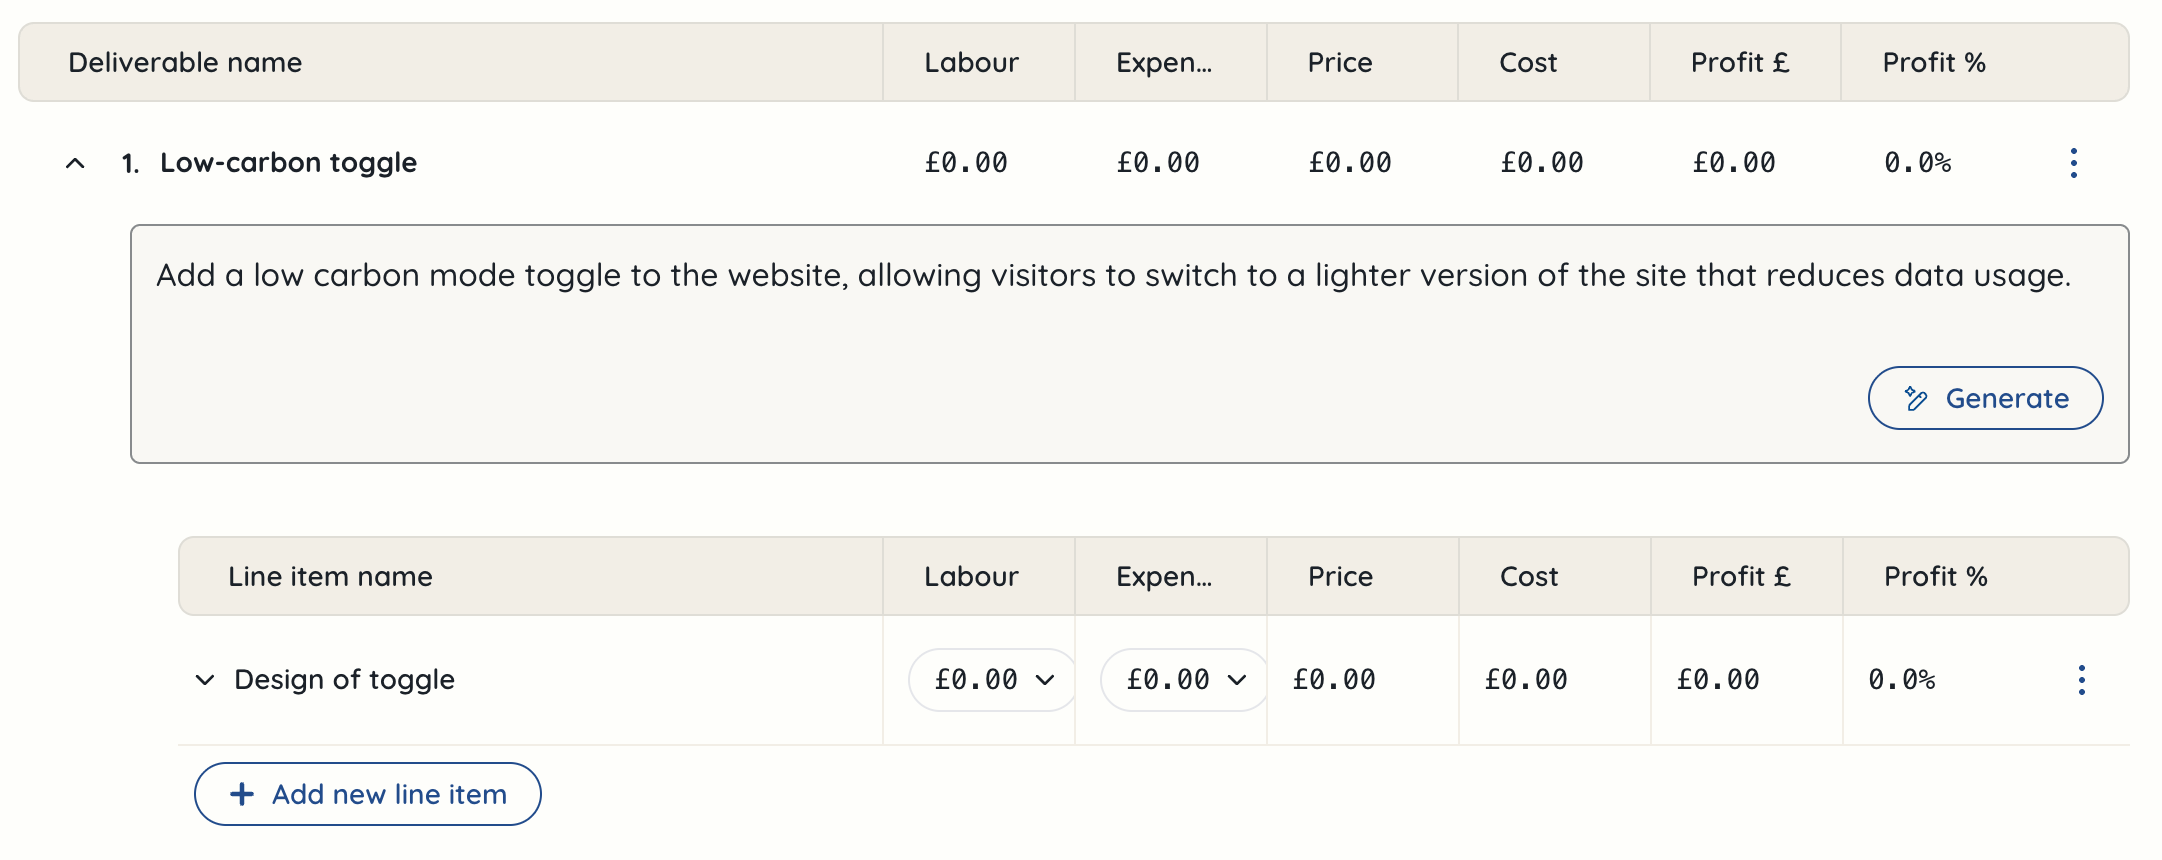 Within the line item, you can add a description that is client-visible, but also notes that the client won’t see on the proposal, but you want to keep track of should the project be approved.
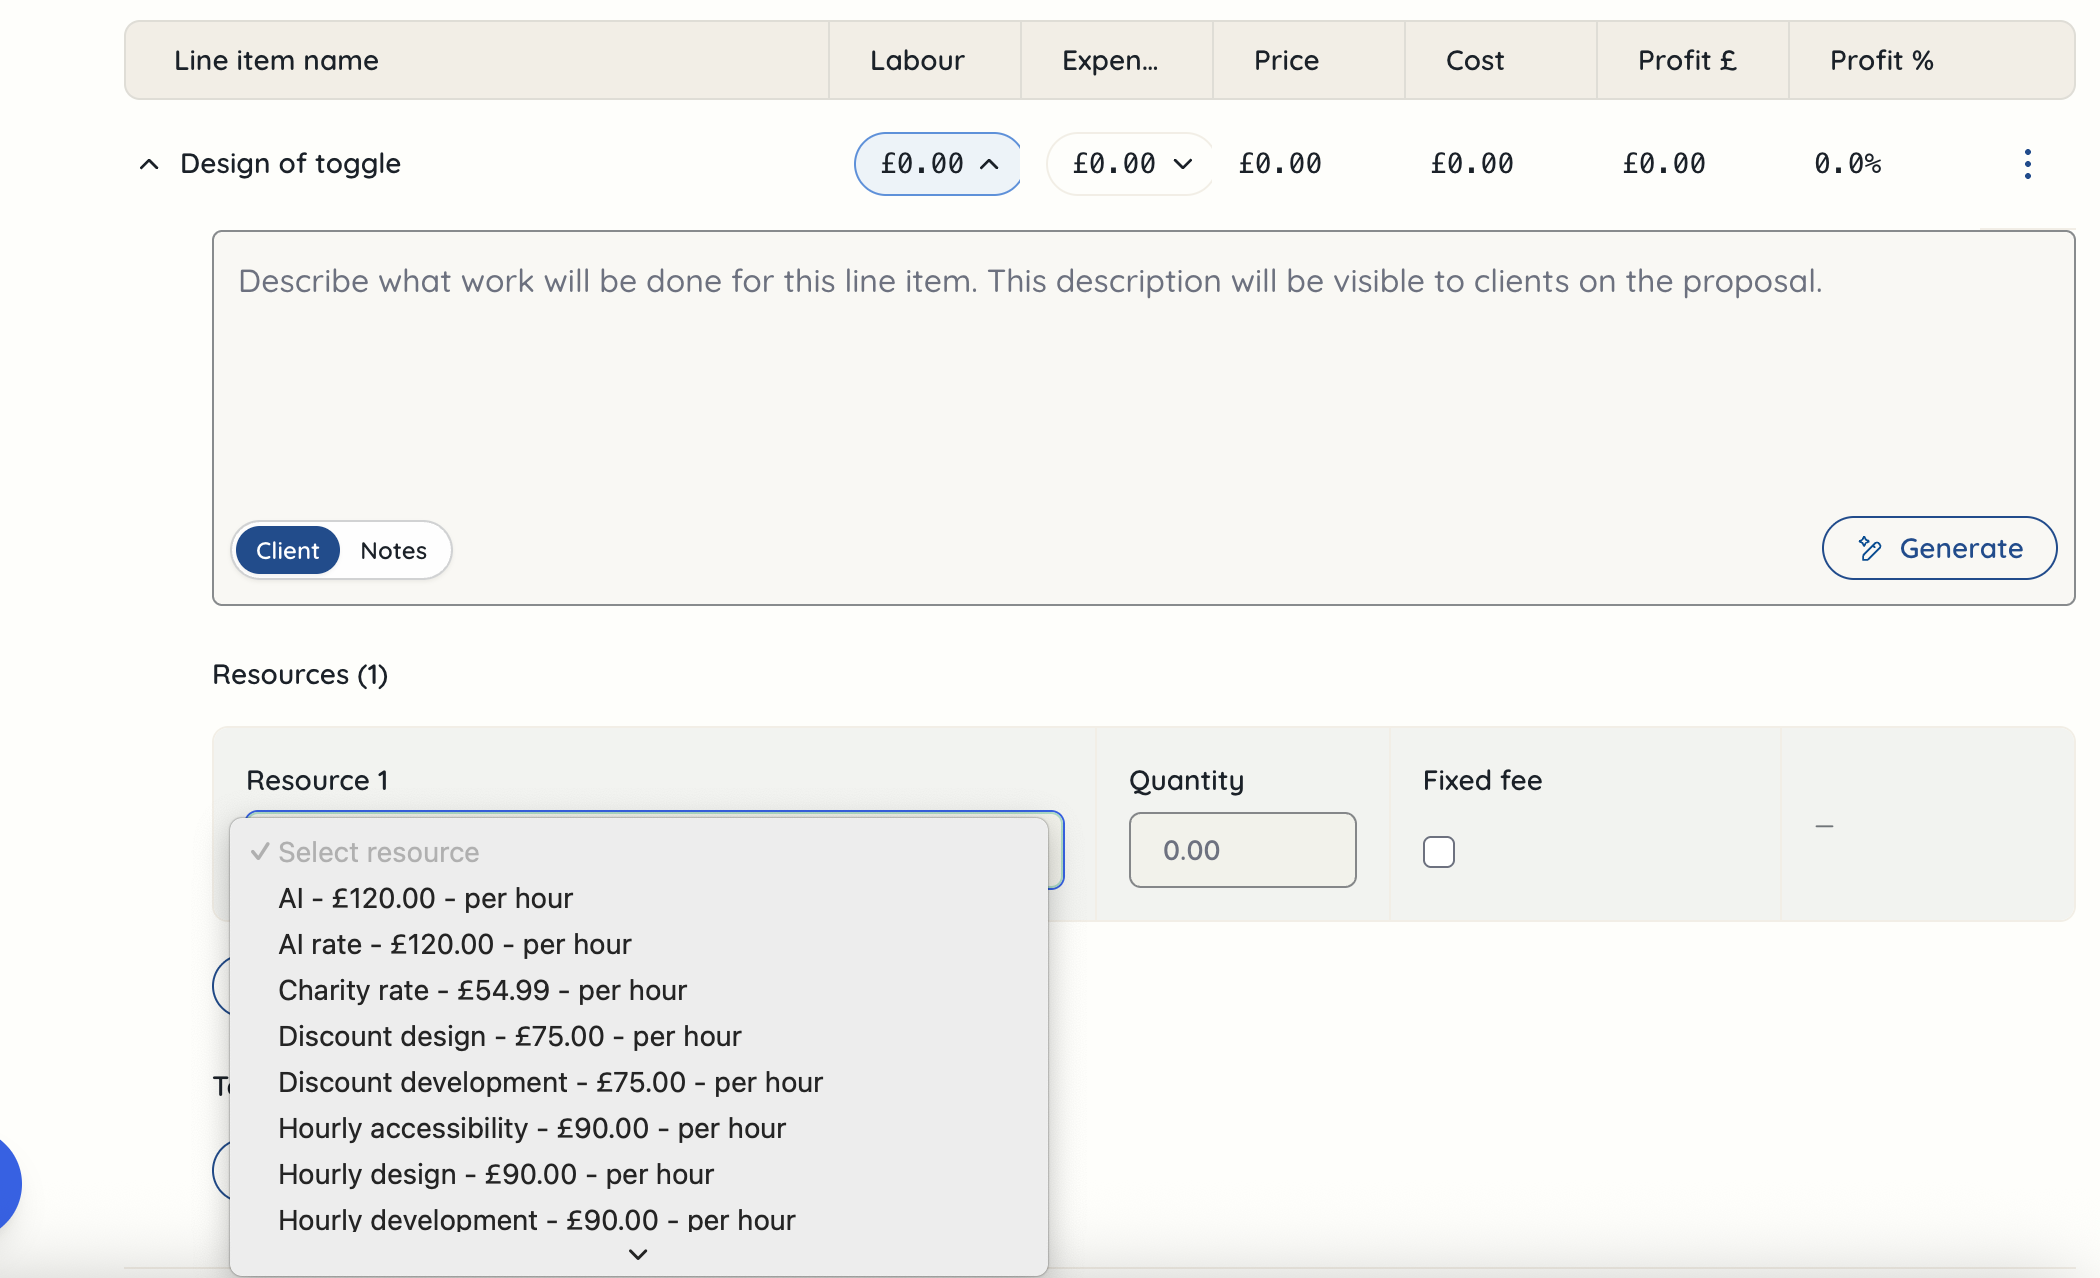
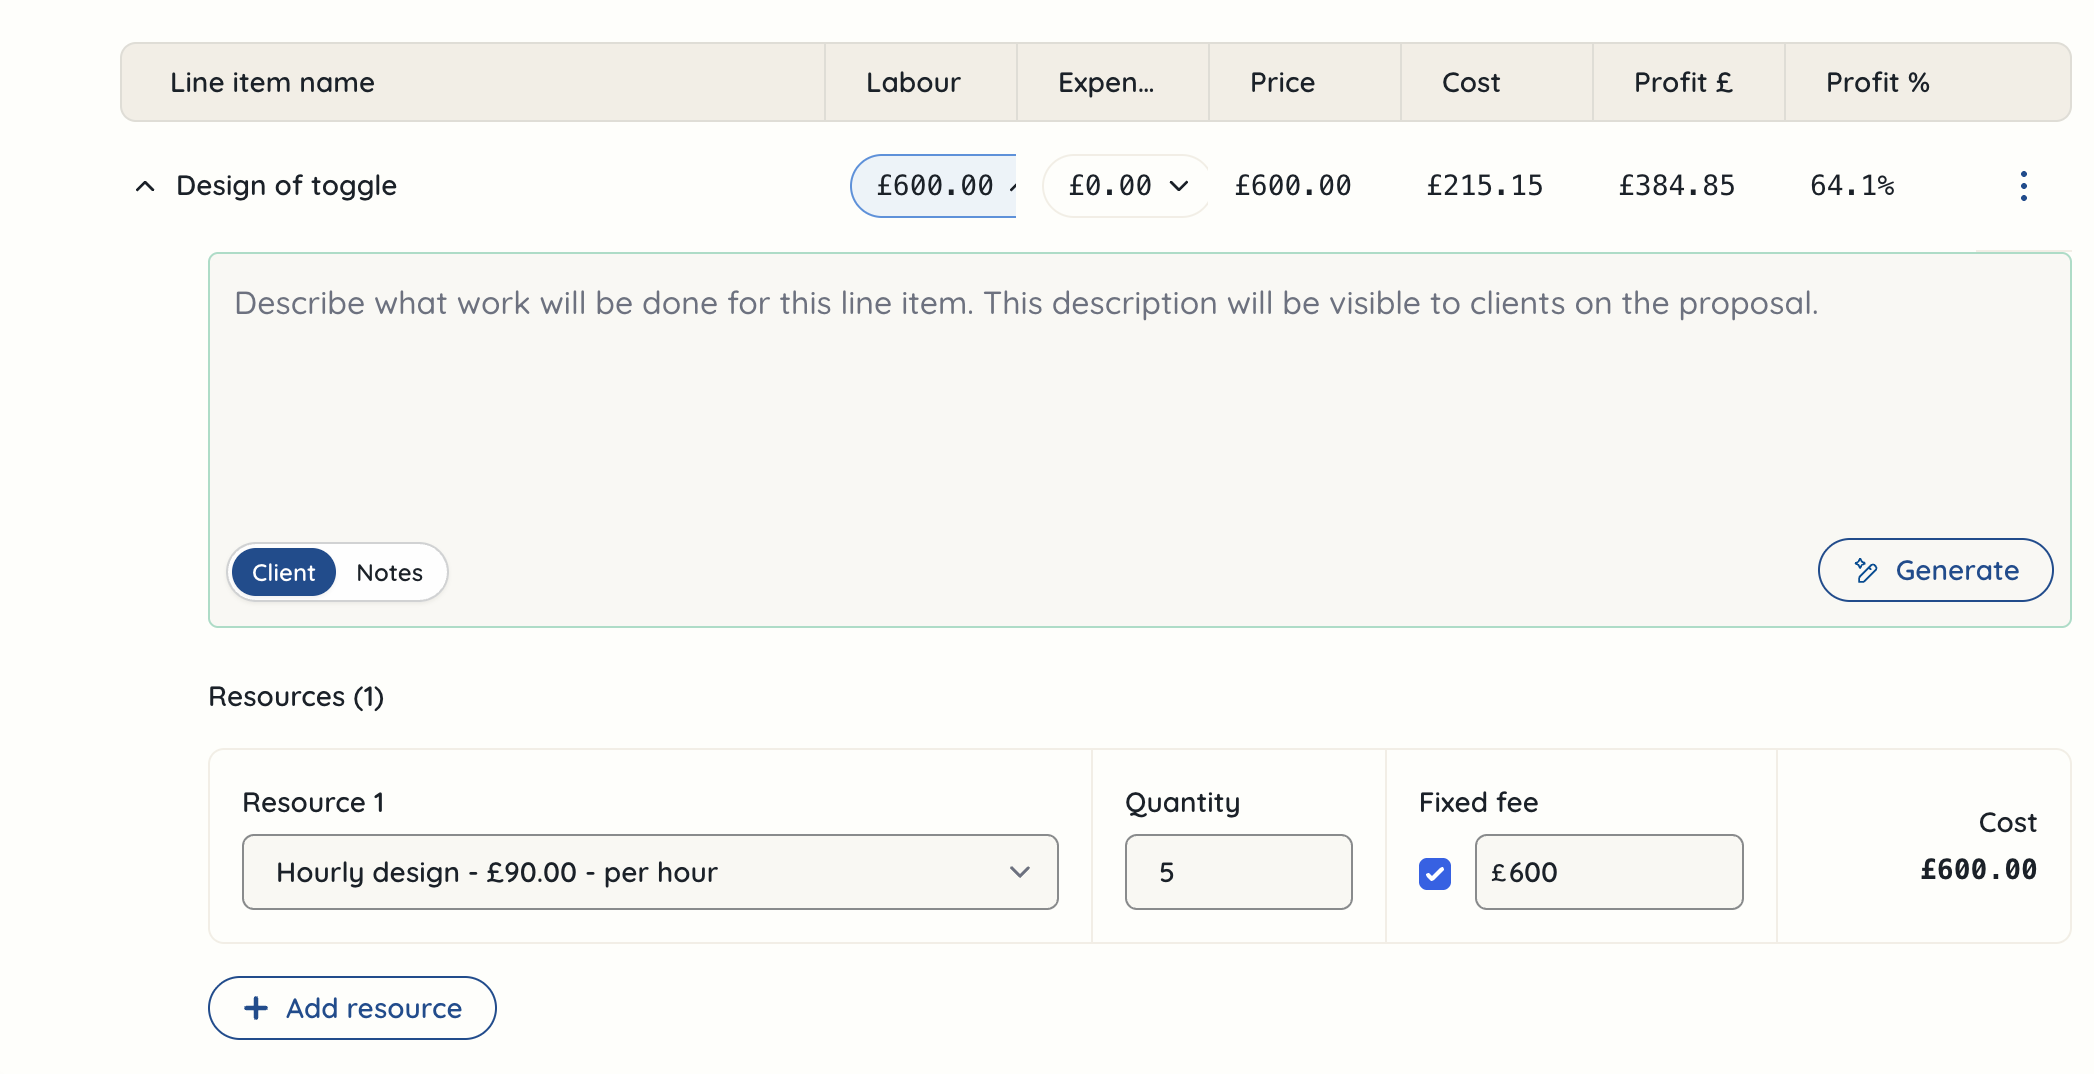
In order to start adding costs to the line item, you need to click on the labour dropdown arrow, and select a ‘Resource’. This is your rate card or the price you want to charge for this item - you can see more about creating rate cards in the team settings guide You can add multiple rate cards, if you have more than one person who will be working on the line item. You then need to select the quantity of hours you’re assigning to this line item. Although this is an example of an hour-based retainer, you may also select a fixed fee for a line item. This gives you flexibility as you’re creating the proposal.
 As you start populating your line items, you will notice that the columns for price, cost, profit etc are automatically updated with figures. These tell you what the profitability will be for that line item if it is delivered at the quantity of hours you have quoted.
 Above the top deliverable, you can toggle to show the figures with overheads and without overheads.

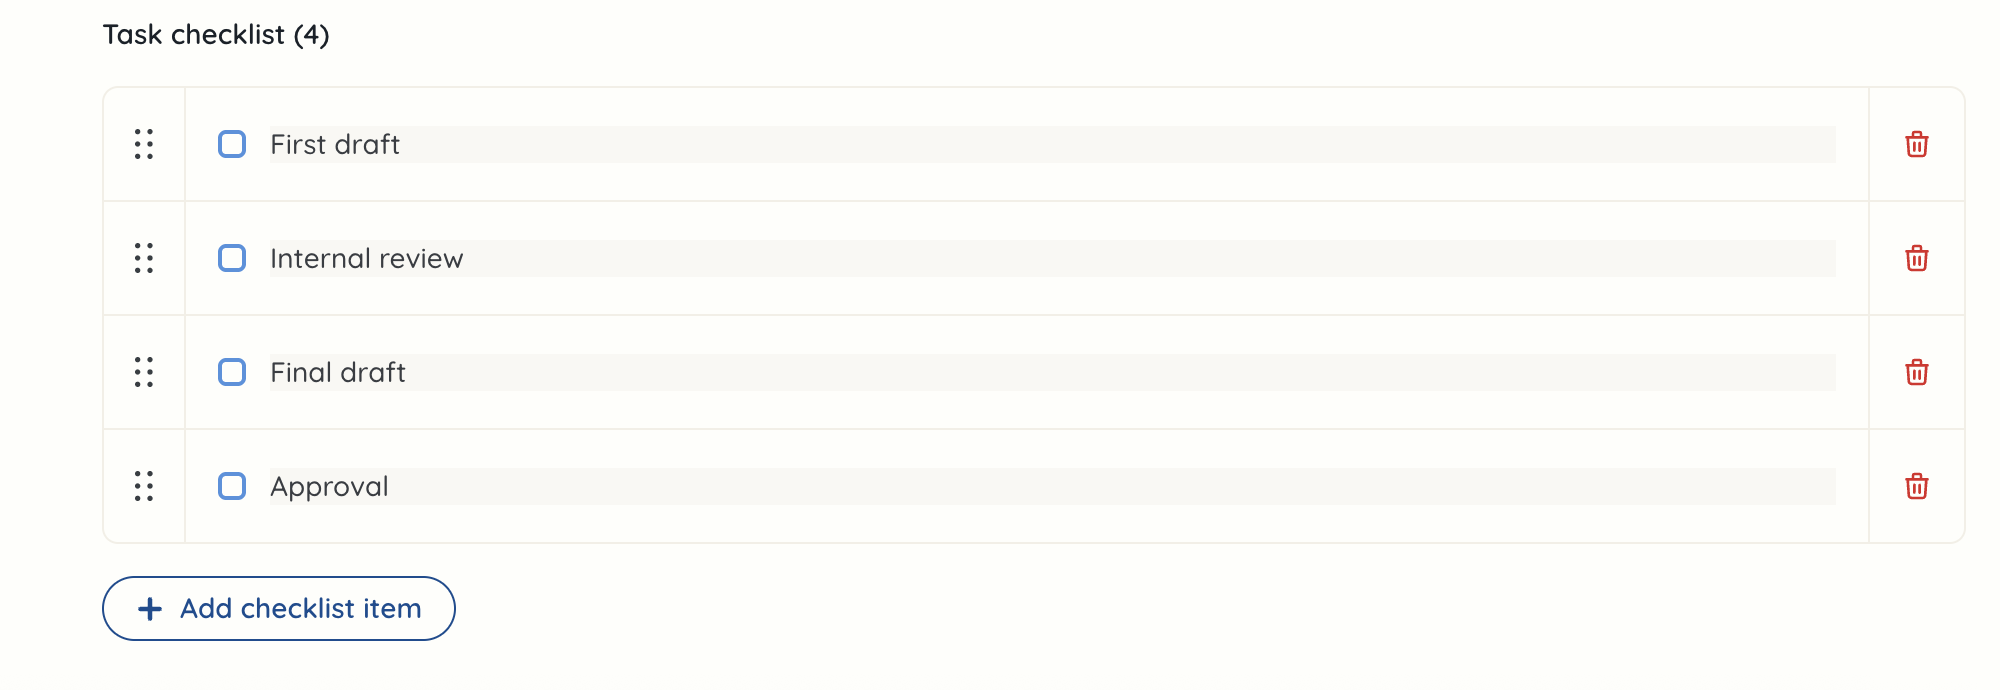
For each line item, you can add a task checklist. This won’t be visible to the client, but if your project is approved and the line items convert to tasks, this will pull through and the person working on it will be able to tick each item off as they go.
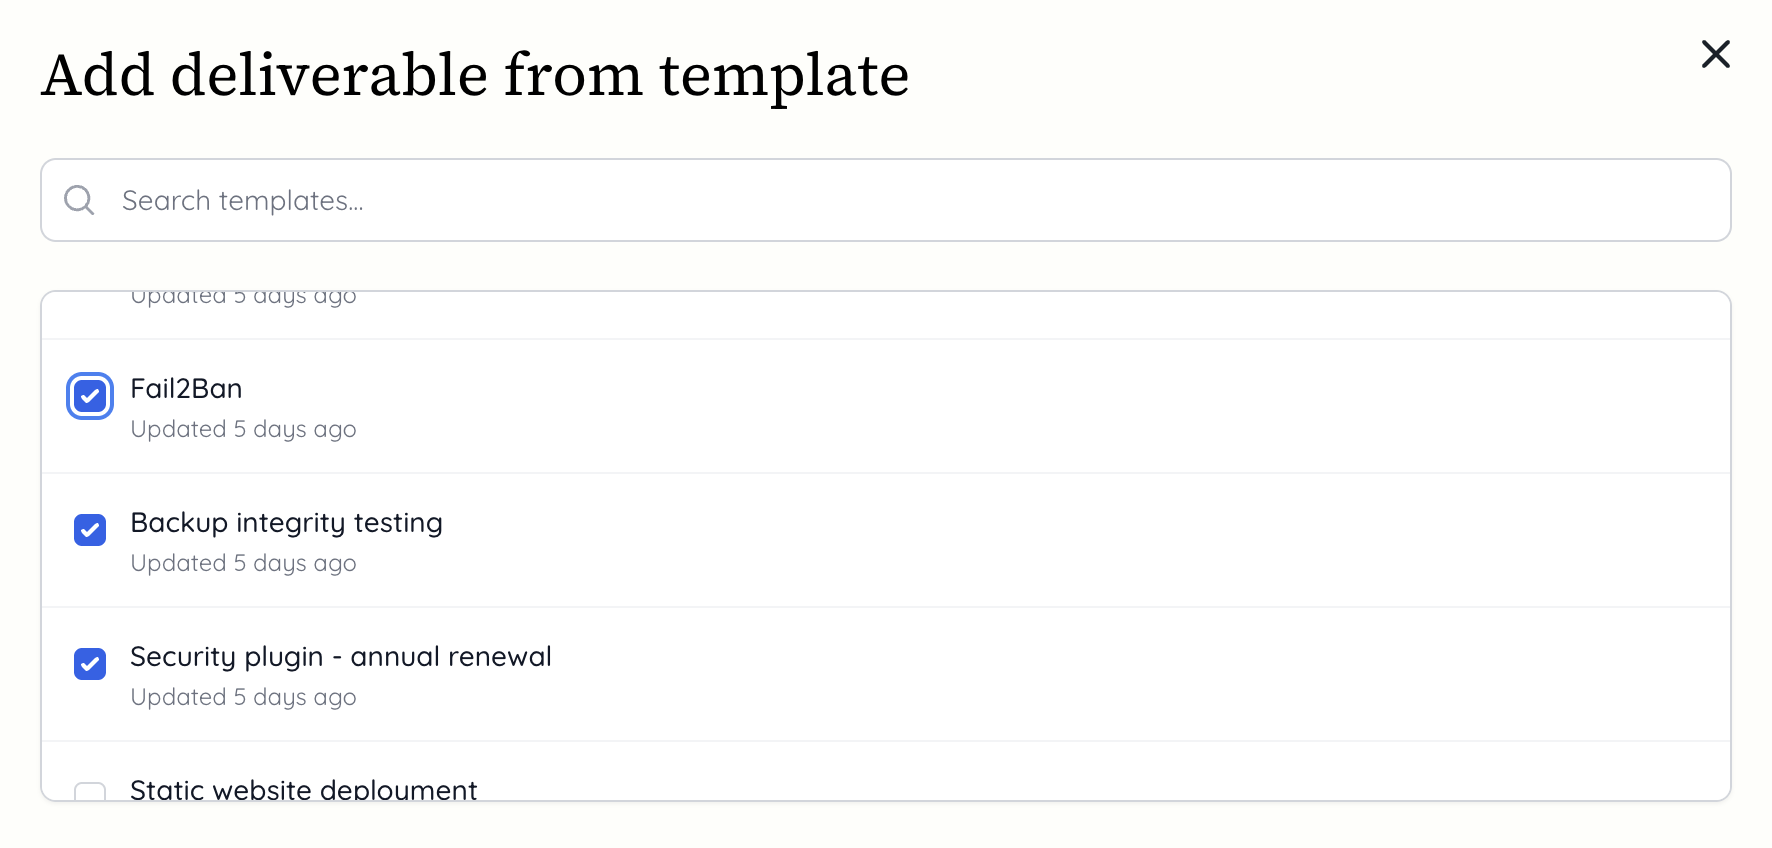
 You can add multiple deliverables from templates at a time. Click on ‘+ Add a deliverable’ and select ‘From template’. Here you can search or scroll to find the template deliverables you want to add. Tick the box next to all of the templates you want to add.
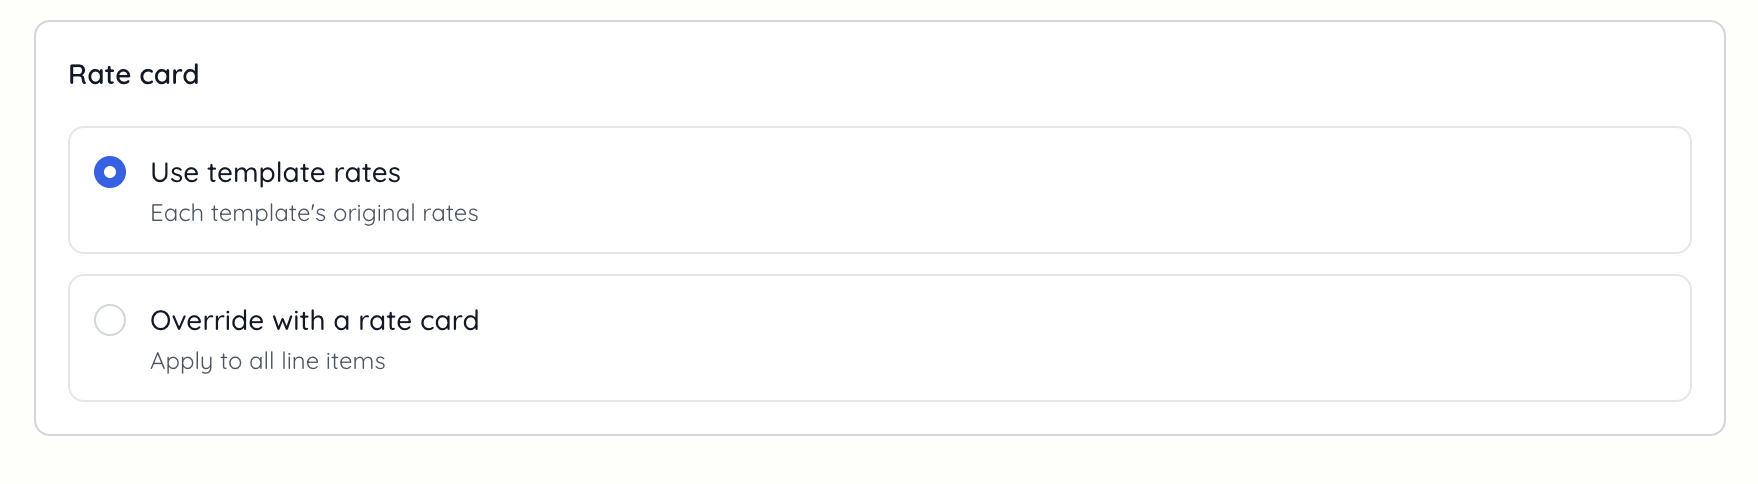
 You can also choose to use the template rate cards that were set, or you can override to pick the rate card for all of the line items. If you have a more junior or senior team member working on the line items, this is your chance to amend it - but you can add them and then change this after they’re in the proposal. Once you’ve chosen this, click the button to insert the templates.
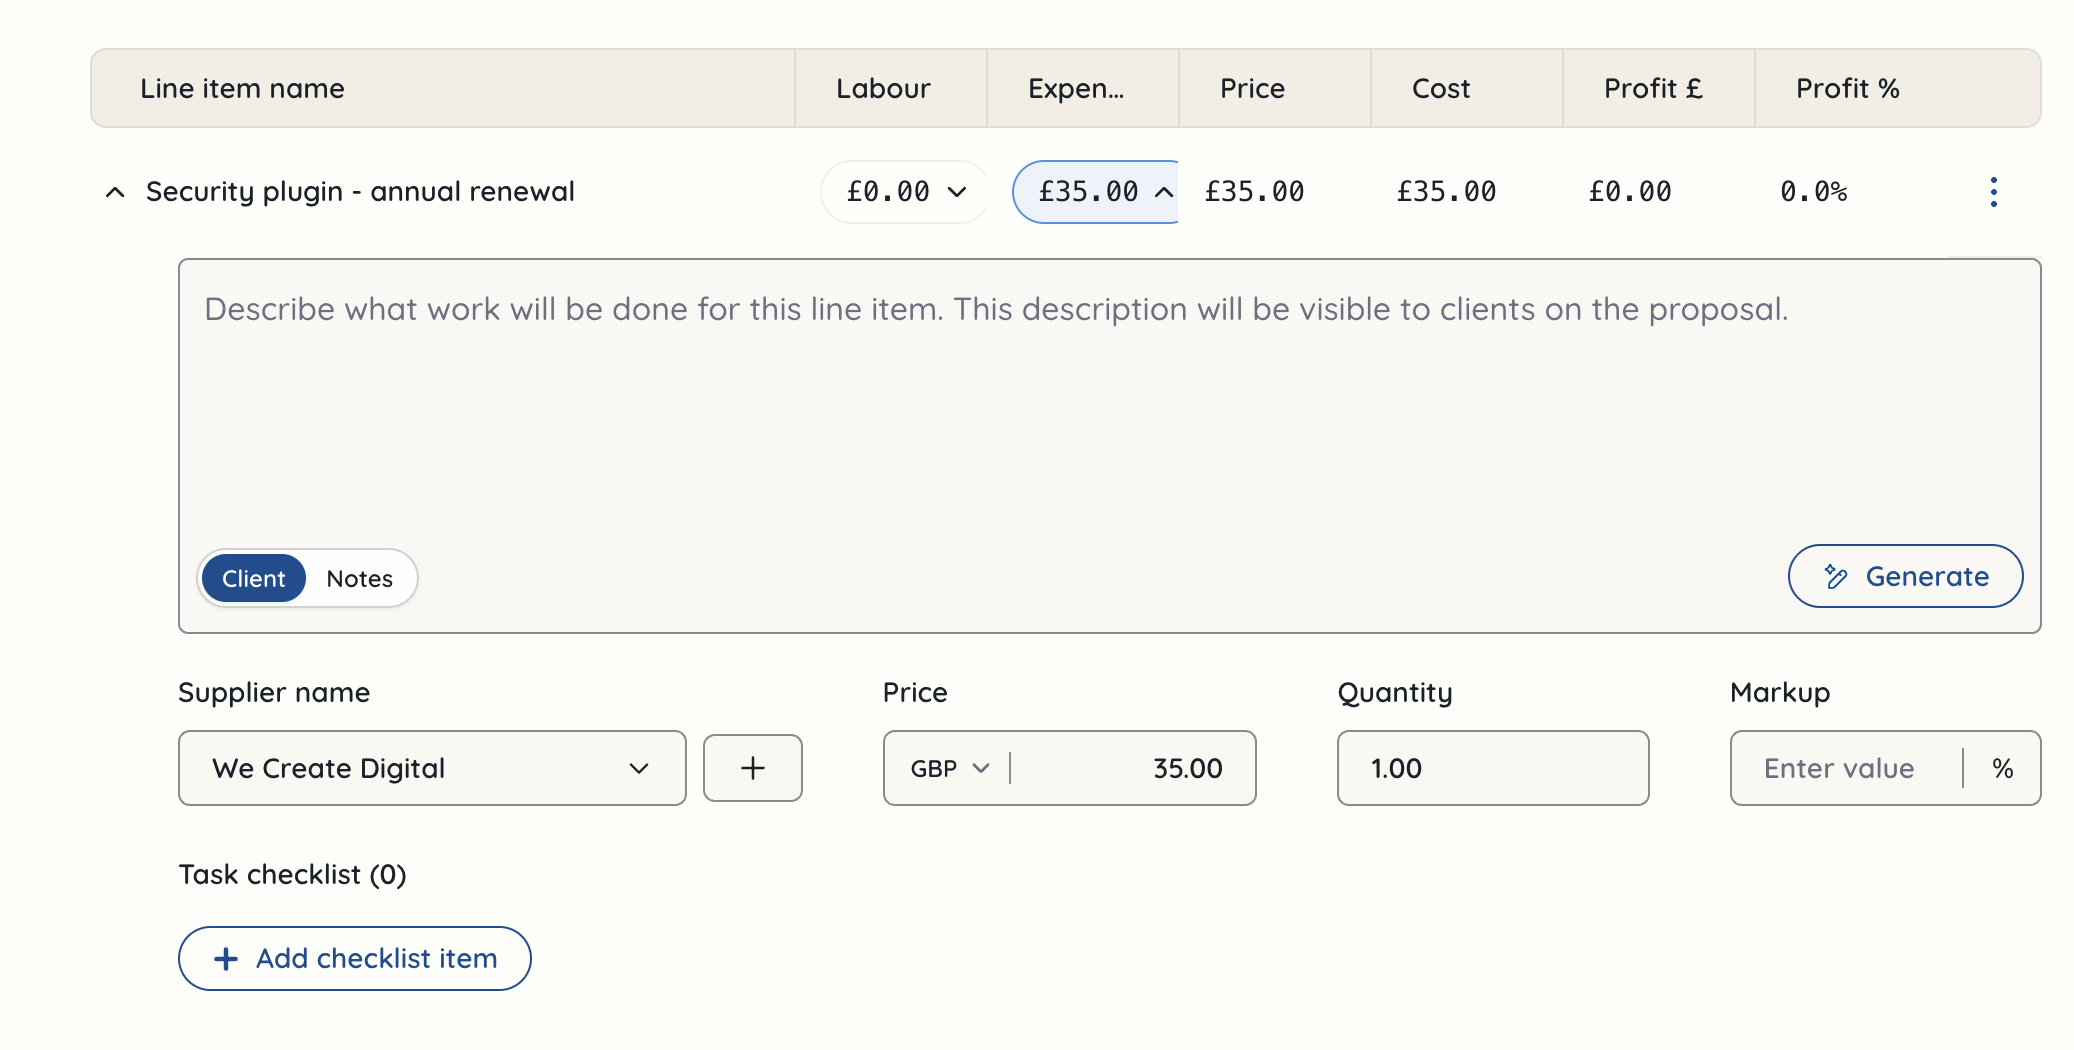
 If you have any expenses, you can add these into line items. Instead of clicking on the labour column dropdown, you click on the ‘Expense’ dropdown and then enter the figure there. You also need to add a supplier - this could be a freelancer, an organisation providing a license etc. It’s also possible to add a markup field. If you’re paying on behalf of a client, you may have a policy to add a 10% markup.
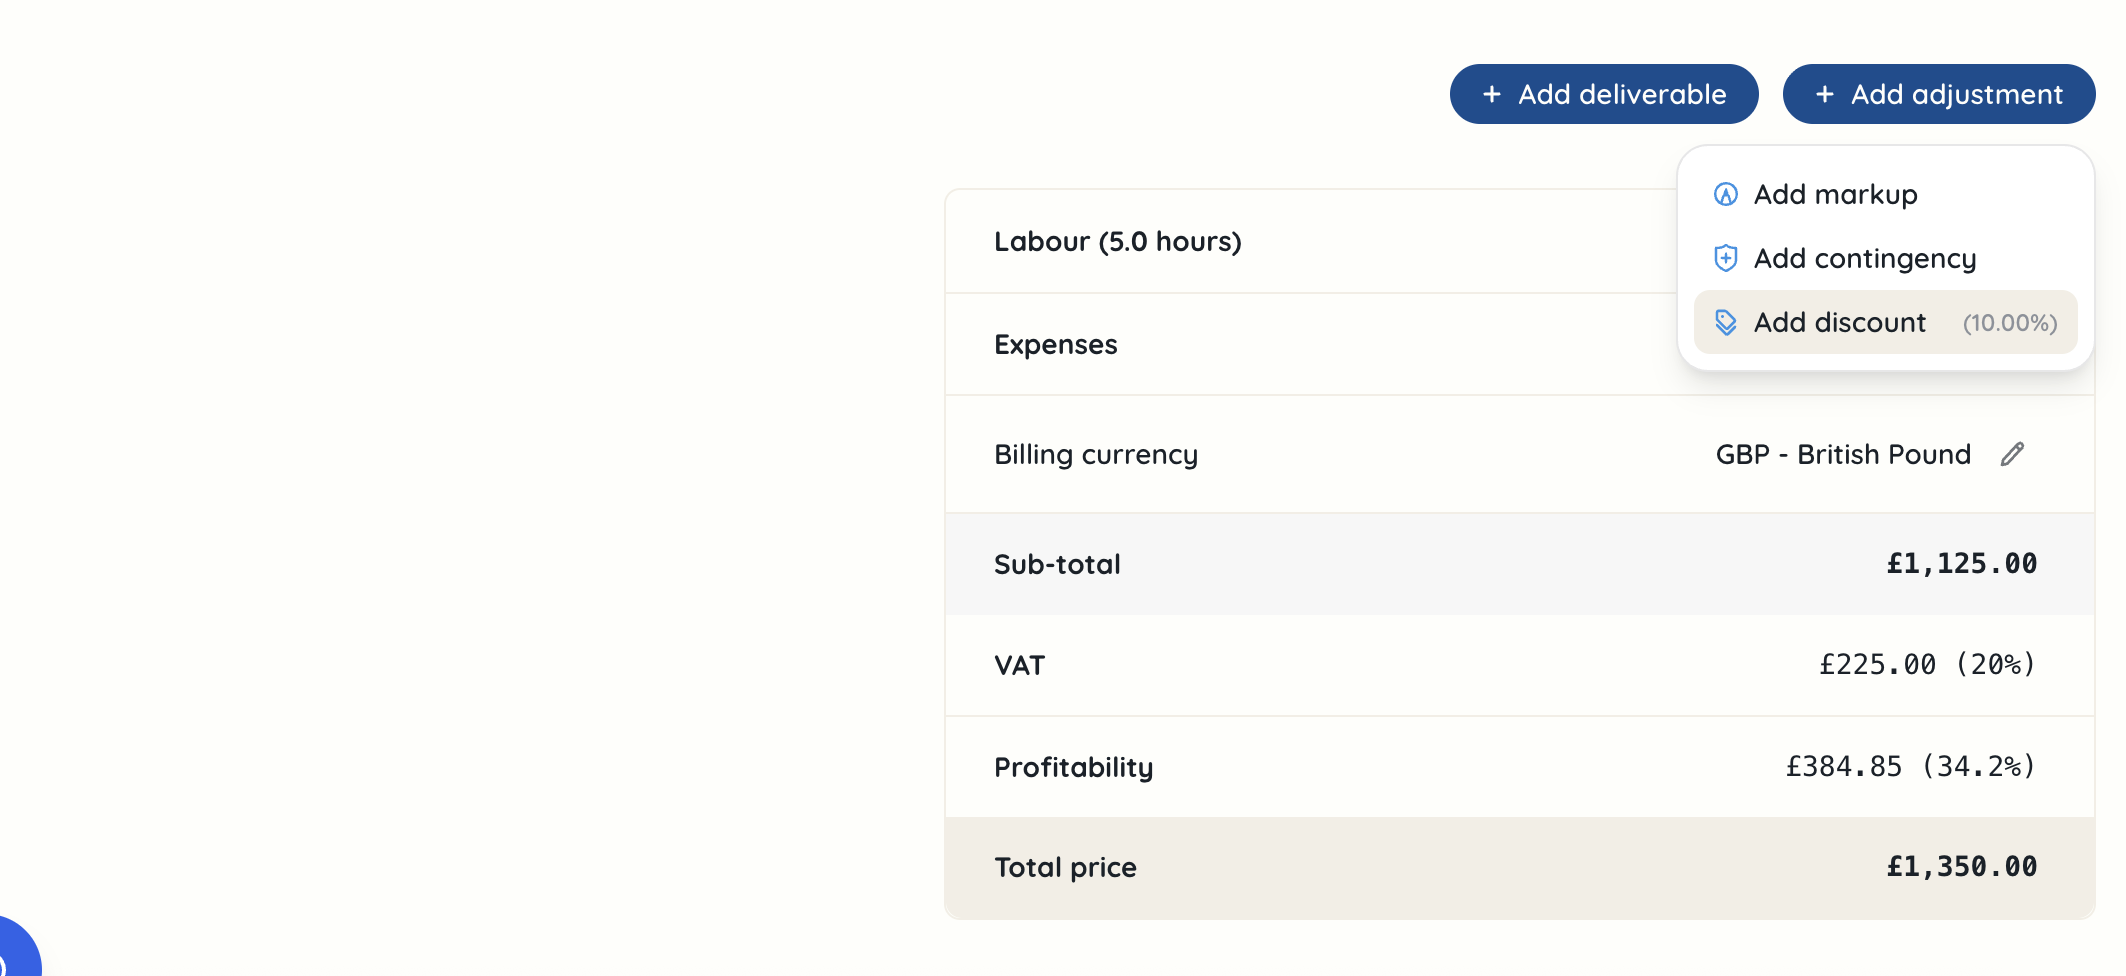
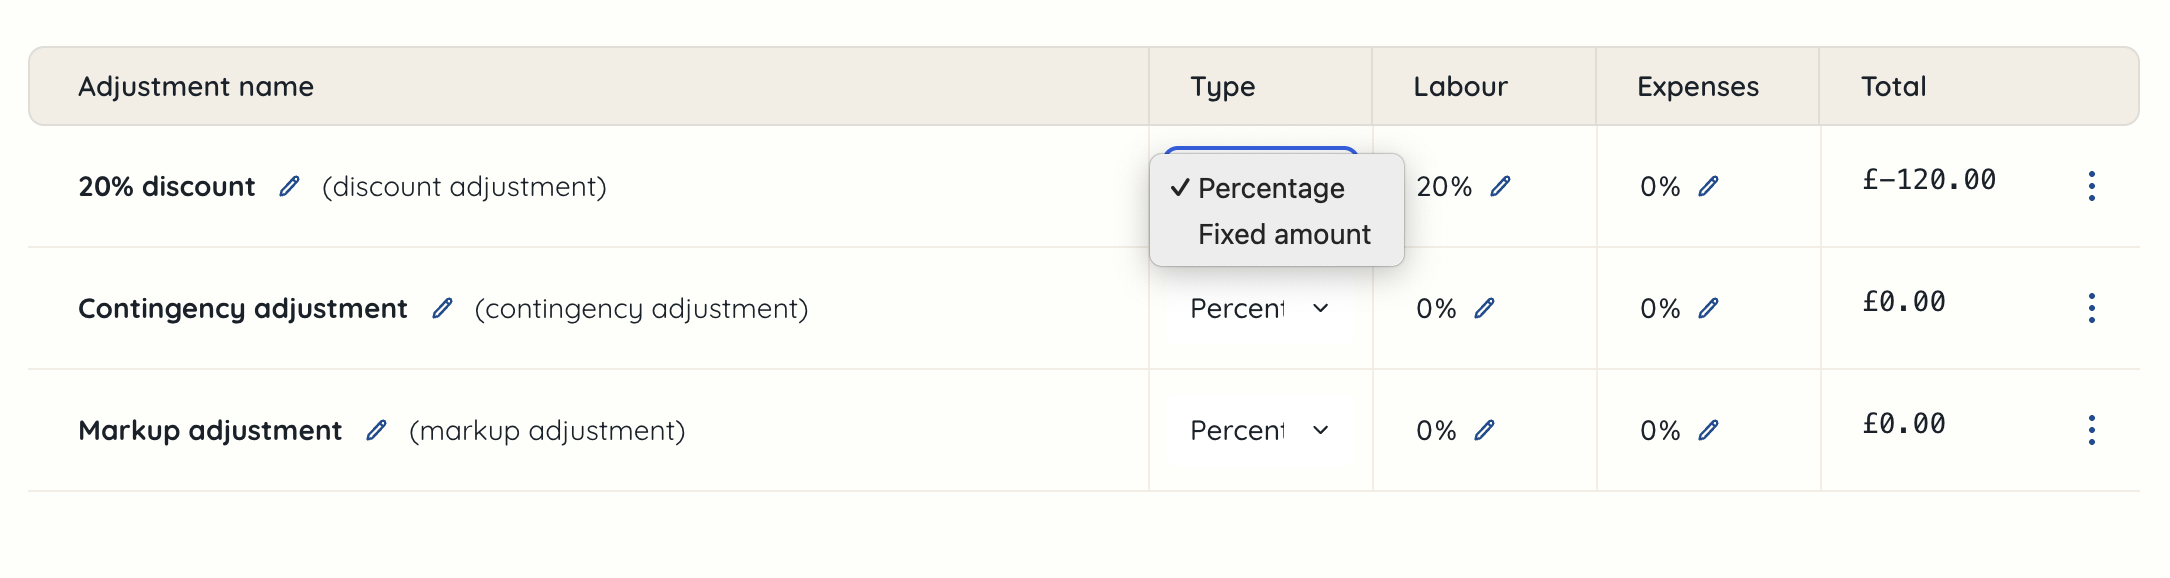
 If you need to add an adjustment, there are a few options for what this could be. Click on ‘+ Add adjustment’ and select either ‘add markup’, ‘add contingency’ or ‘add discount’.
You’ll be able to select either percentages or fixed amounts for each of these adjustments.
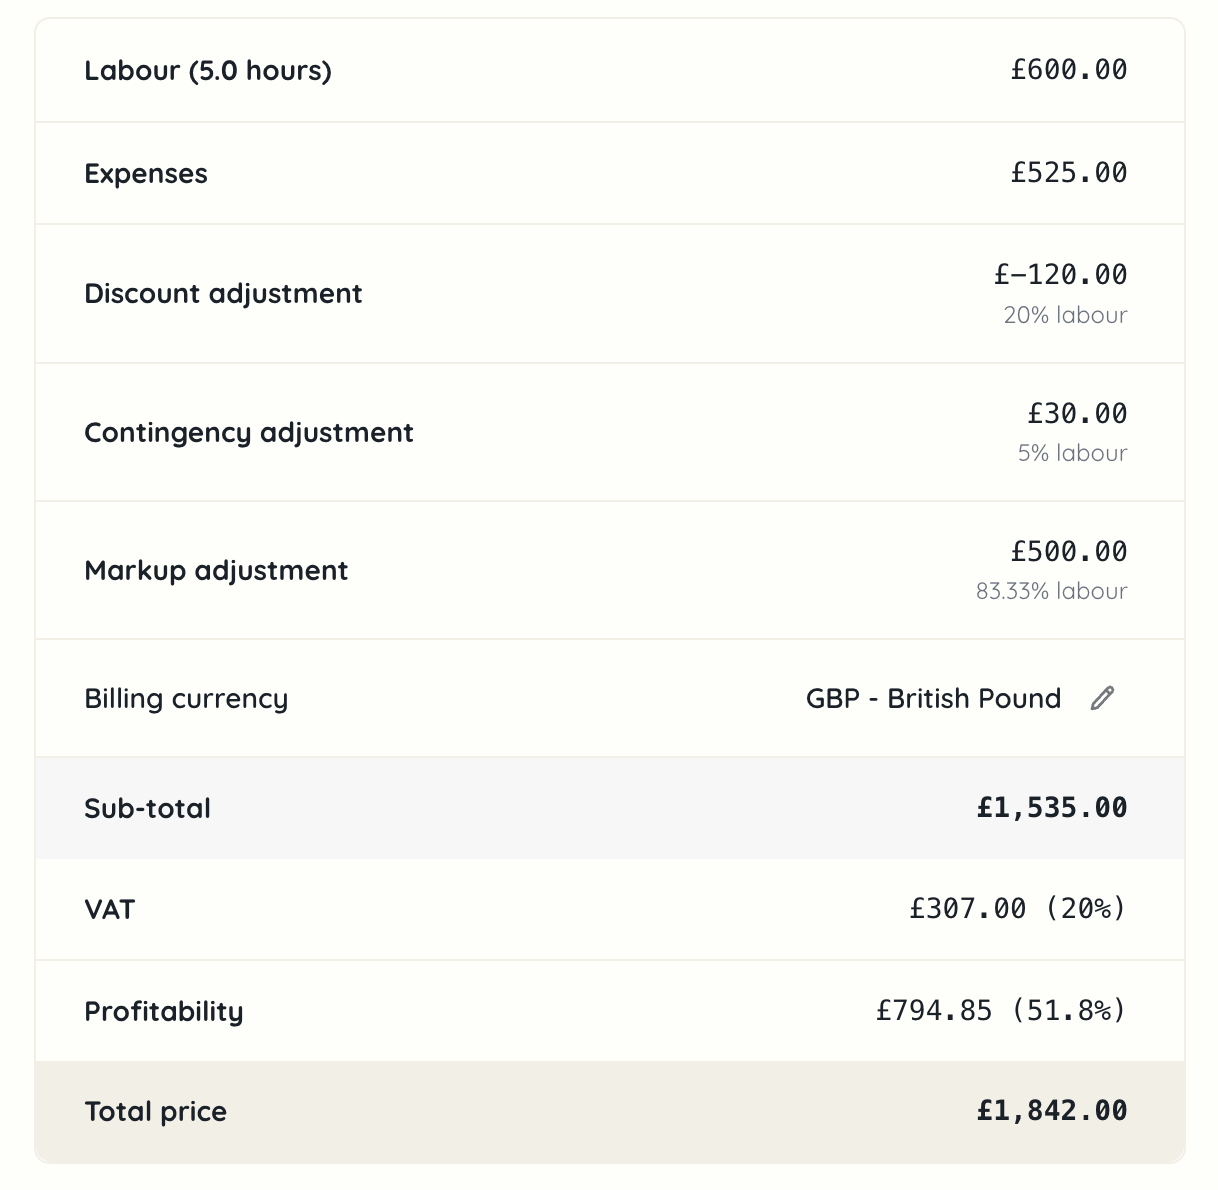
 If you scroll down to your total, you can see the overall costs for your proposal including the adjustments you have added on. Furthermore, you can see the totals for the project including the profitability. This helps you to understand whether you’ve priced your proposal correctly and are getting the profit you want.
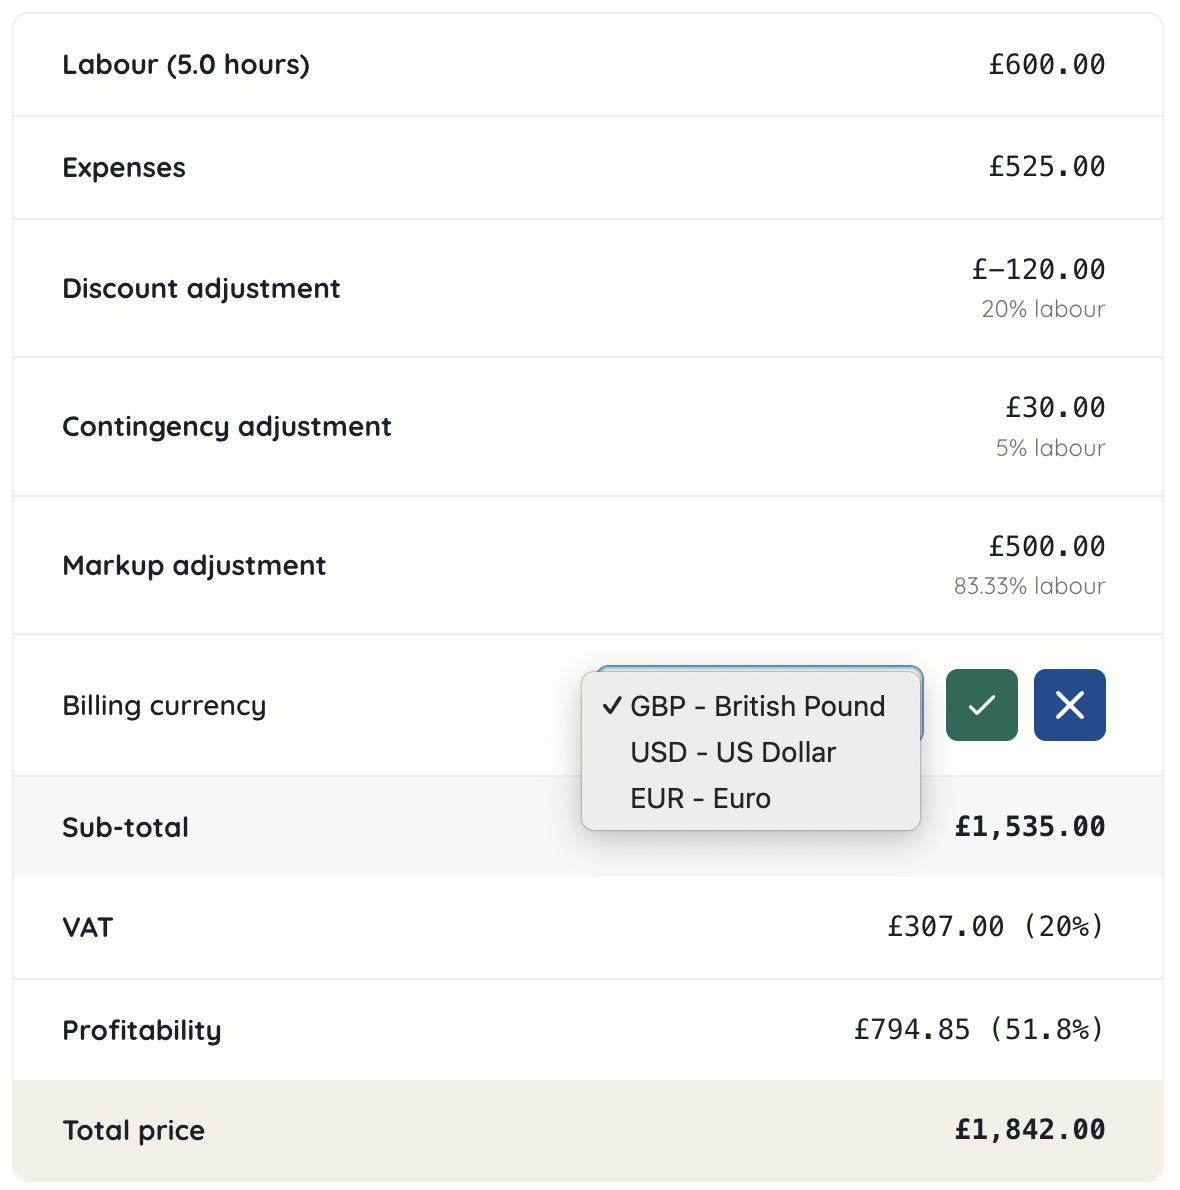
 If you want to change the billing currency, you can click the pencil icon next to the currency, and pick from the selections you’ve chosen in your settings for currencies (see more in the guide for team settings) that your agency work with.
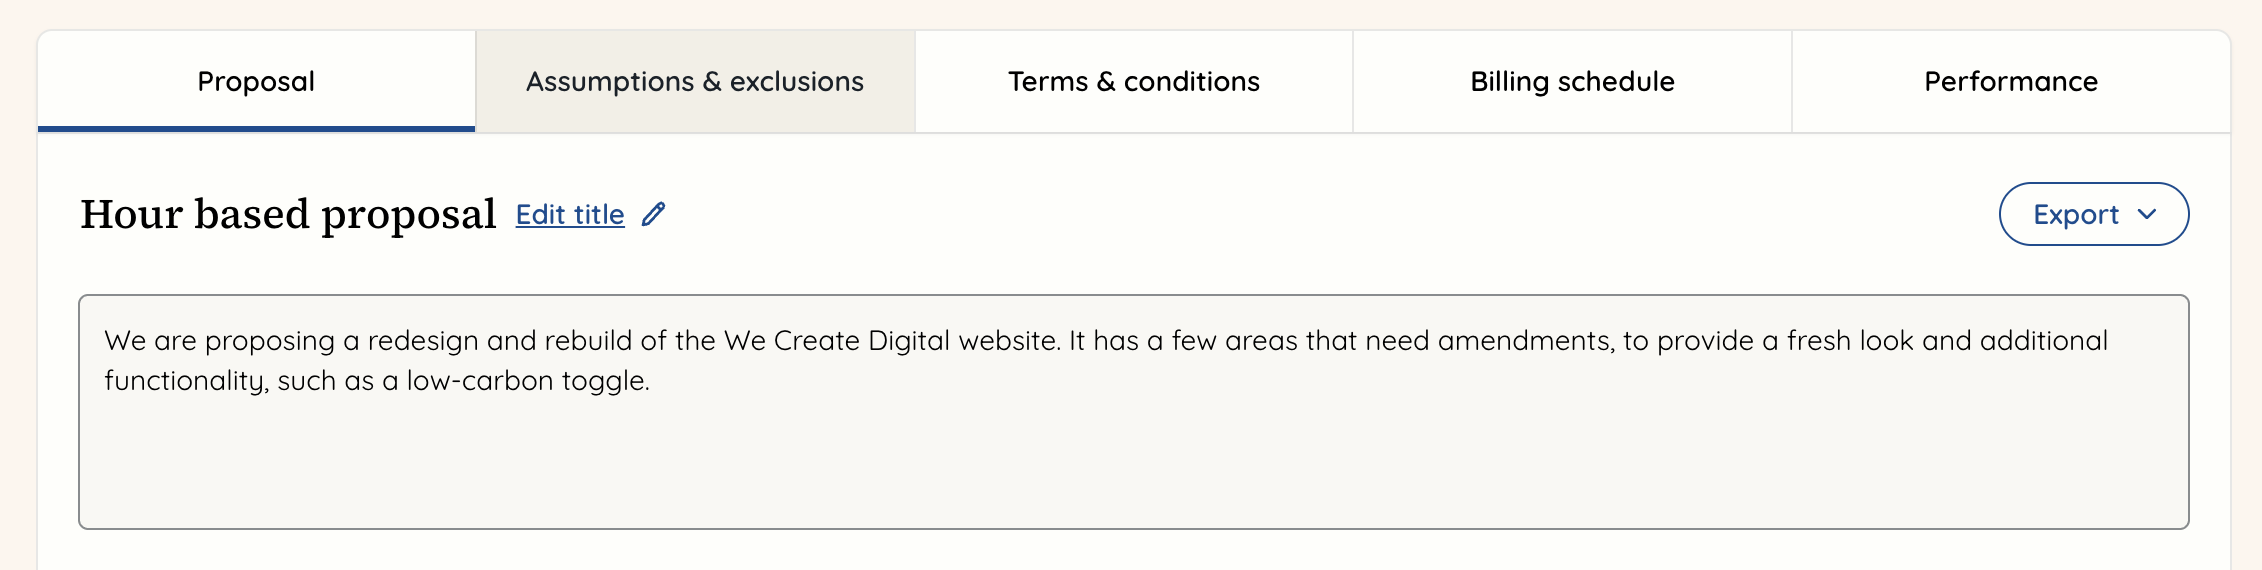
 When you’re finished with the content of the proposal, it’s time to add all of the other aspects to it so it is ready to share with the client to be approved. Scroll back to the top and click on the ‘Assumptions and exclusions’ tab.
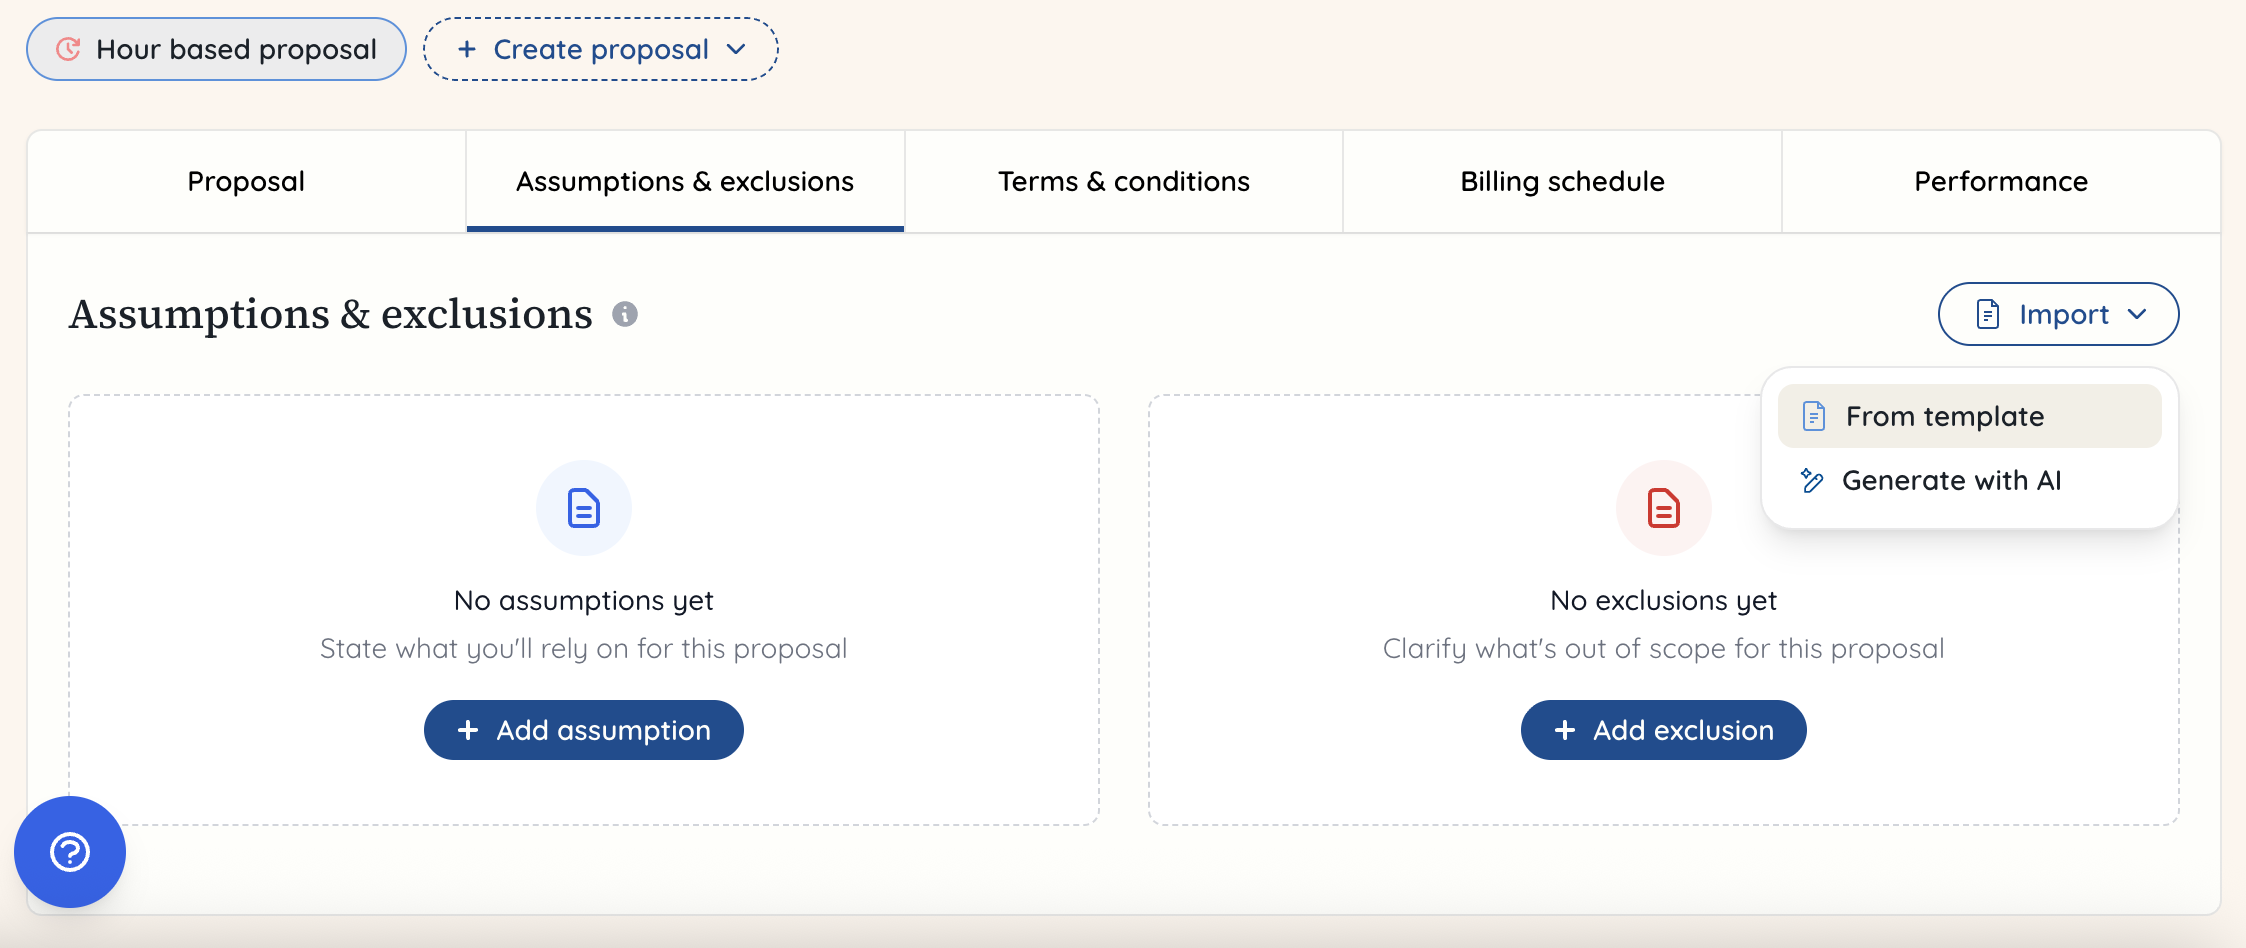
 You can add assumptions and exclusions from a template, which we highly recommend to save this being a manual task each time, or you can add them in here. You can also do a combination, so add from template but also make edits or delete or add new ones. If adding from a template, click on the ‘Import’ dropdown and select ‘from template’. Alternatively, just click on the blue ‘+ Add assumption’ or ‘+ Add exclusion’ buttons on each column.
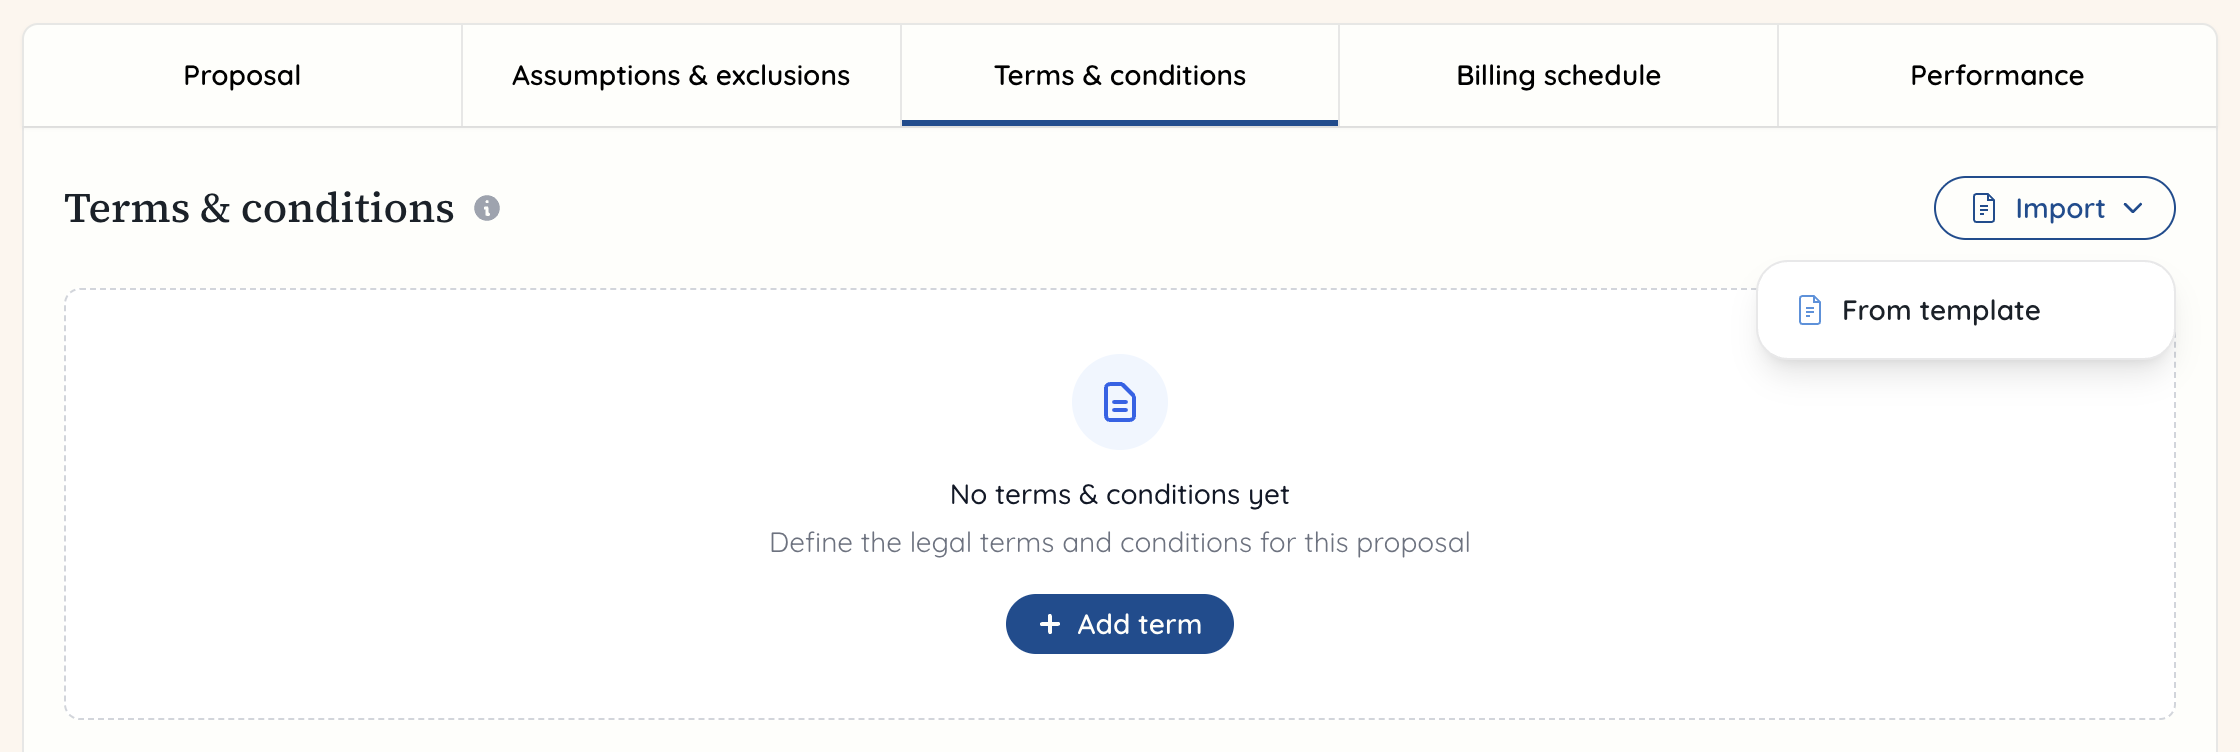
 Once you’ve happy with these, you’re going to click on the ‘Terms and conditions’ tab to enter the details that turn this proposal into a contractual agreement. Again, click on ‘Import’ and then select from template to avoid having to add these manually each time. You can add additional terms and drag and drop these by clicking on the six dots on the left hand side of each term, or you can edit the terms you have.
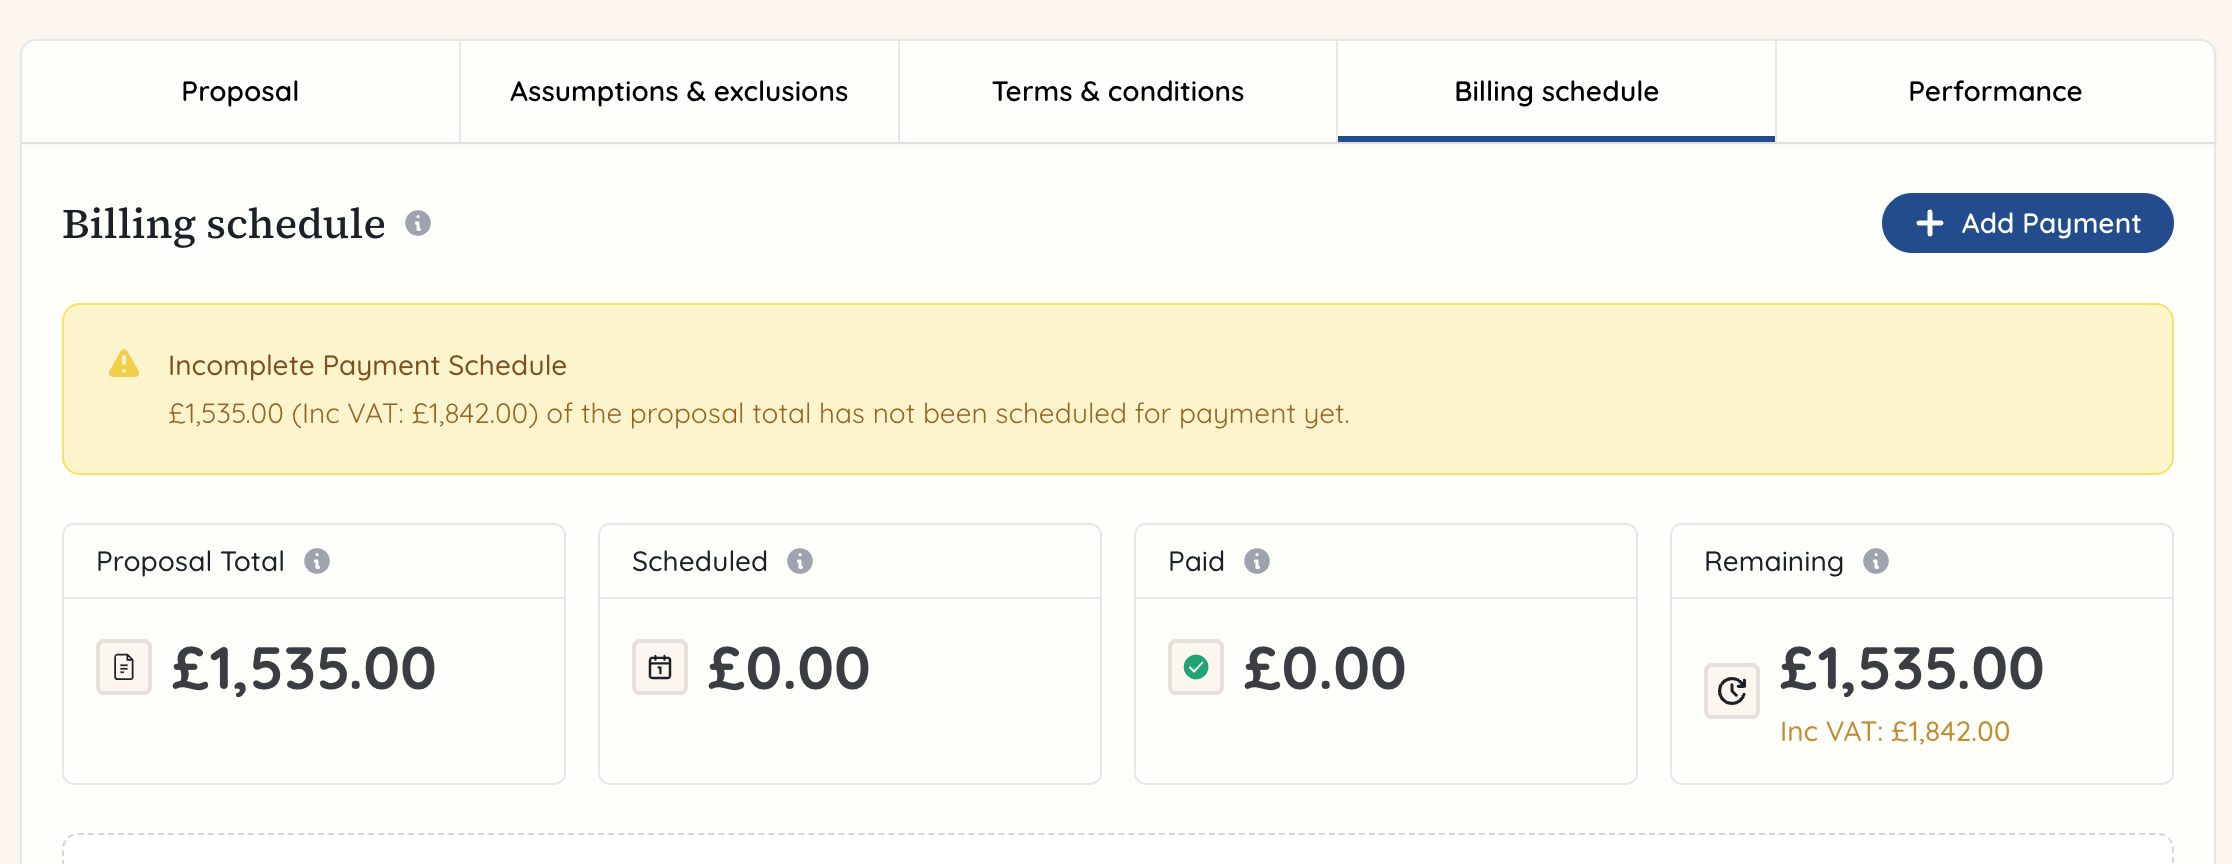
 Now click on the ‘Billing schedule’ tab to add in how you would like the client to pay you. This will show you how much the proposal total is.
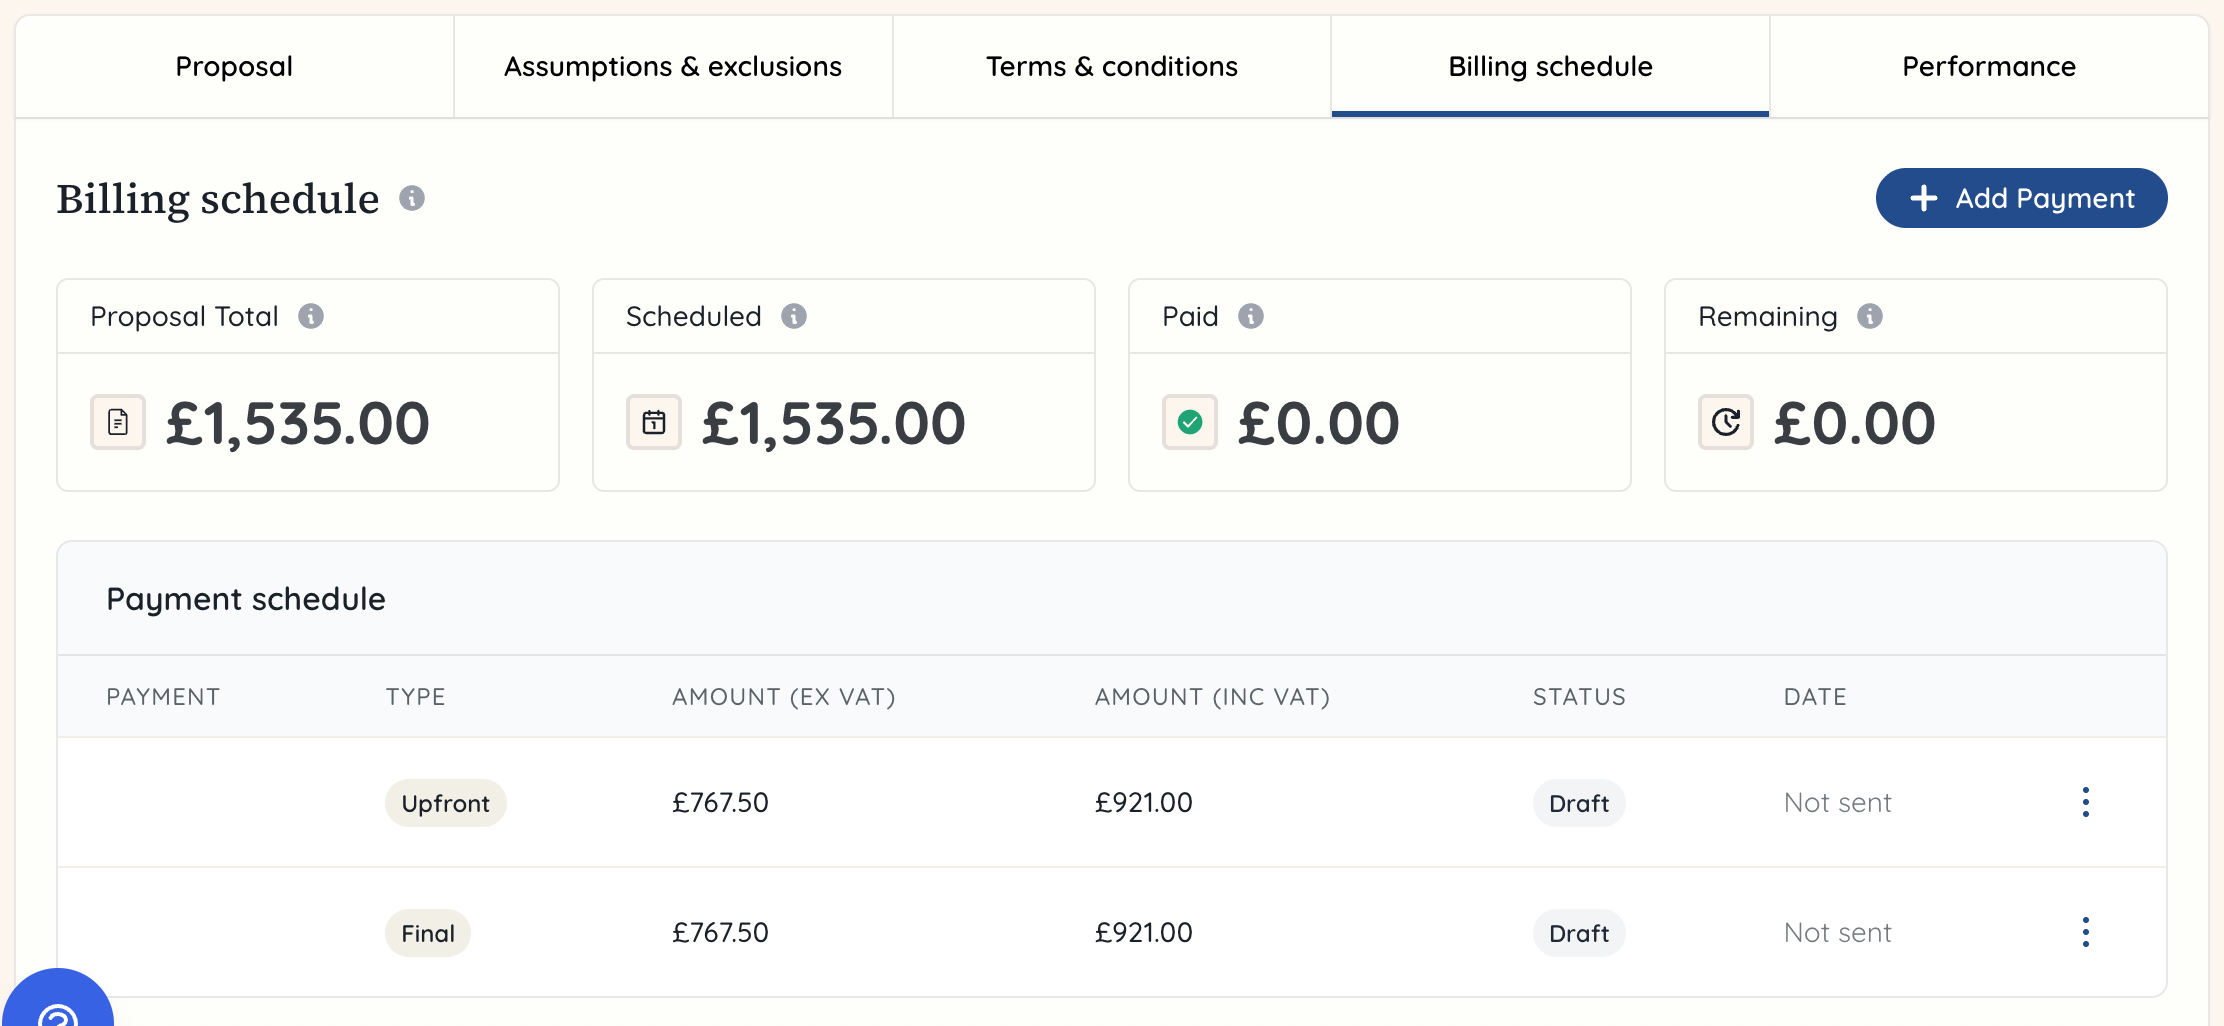
 You can choose to add payments manually or you can select a common payment structure. You can also go to your settings and add a new common payment structure there (you can see more about this in the team settings guide under the financial section). If you select 50%/50% split, it will automatically create two payments in the schedule, each adding up to 50% of the total.
 If you change your mind, you can delete the payments once they’re added in and then click on another payment structure. Once you’ve got your payments in place, just check that they match up to the scheduled total. If the total is an odd number then you may need to edit one if it is 1p out.
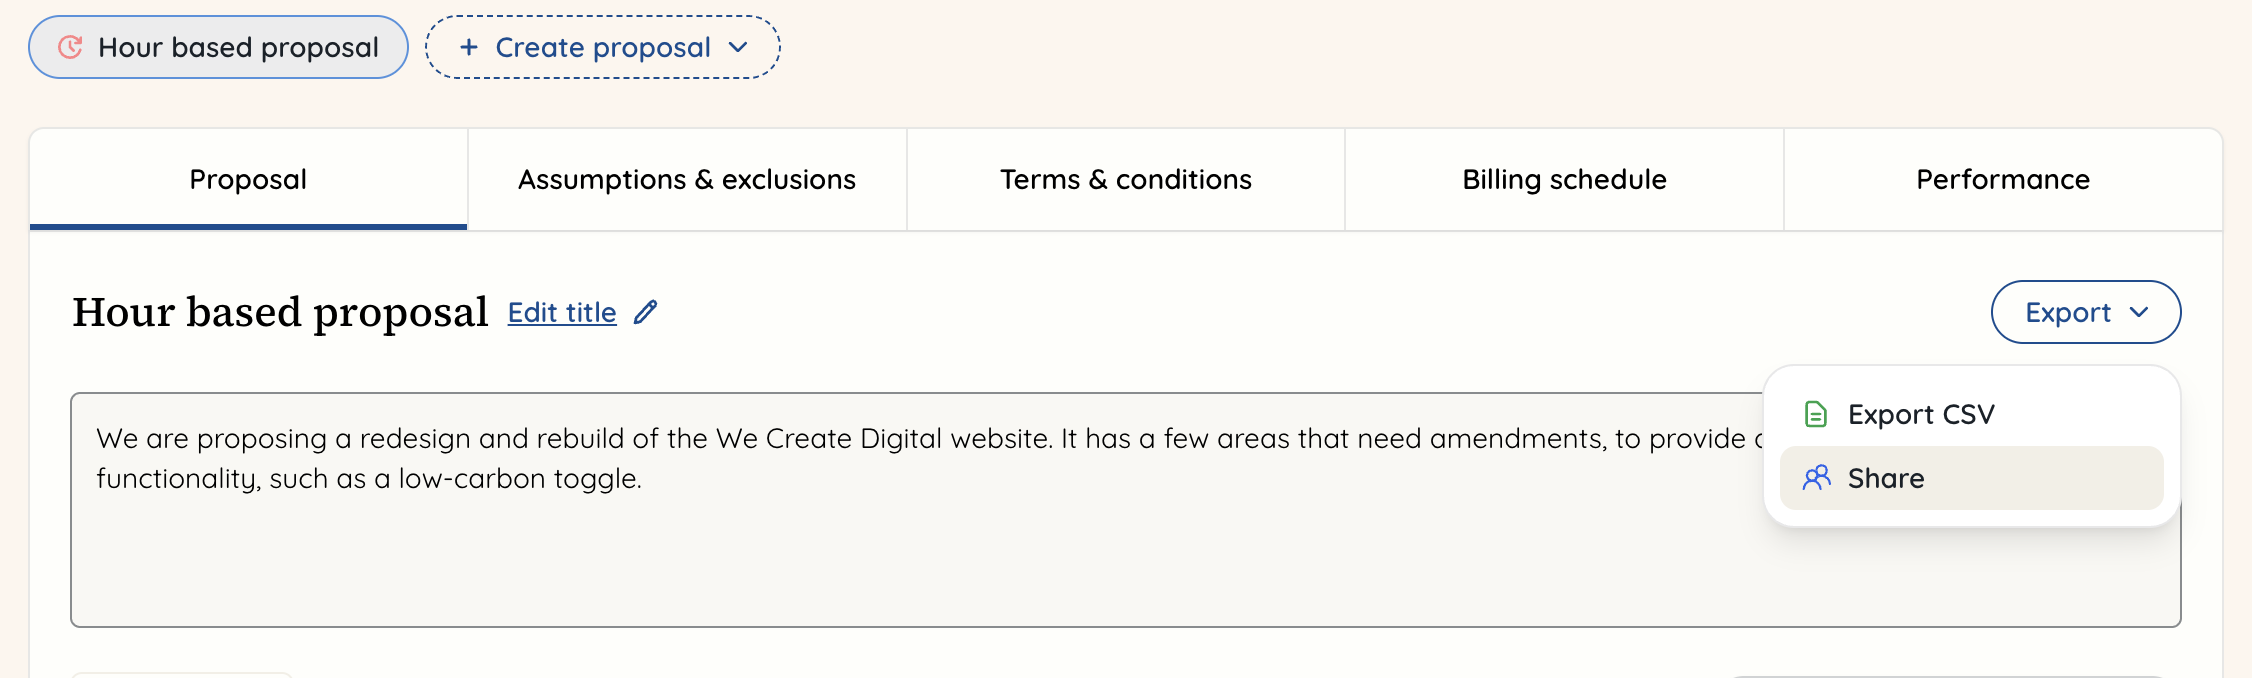
 When you’re happy with the proposal for the project, you can share this with the client. Don’t forget to check you’ve added branding to your proposals if you’re sharing them as a PDF (you can see how to do this in the team settings guide in the proposals section). Go to the proposal tab, and on the right hand side click ‘Export’. On the dropdown, click on ‘share’.
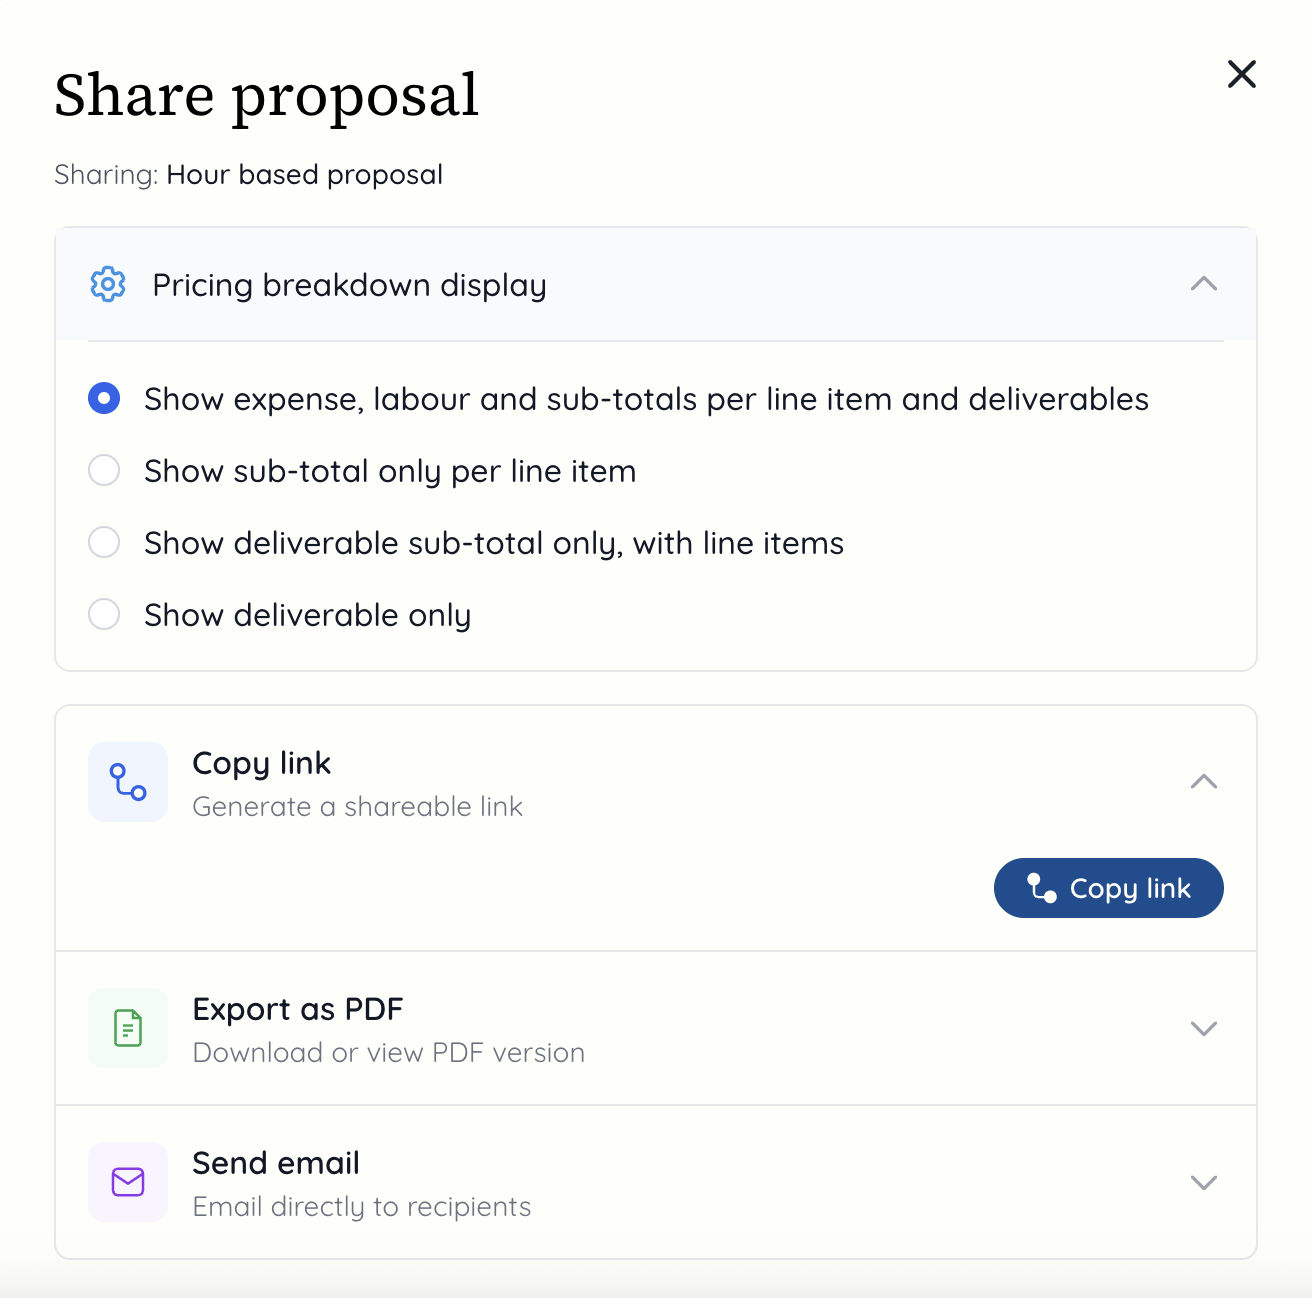
 A modal will appear giving you options for how to share the proposal. It also gives you a dropdown for the ‘Pricing breakdown display’. When you open this dropdown, you can choose what is visible in the proposal. You may want to show the full breakdown, or you may want to show more limited items such as the deliverable sub-total only with line items.
You can then choose how you want to share the proposal. You can copy the link to paste into an email to the client or potential client. If you choose this option, you can make edits to the proposal and they’ll be updated in real time so will be reflected in the proposal link. Alternatively, you can export it as a pdf to attach to an email. Finally, you can send it directly from Rofinery as an email.
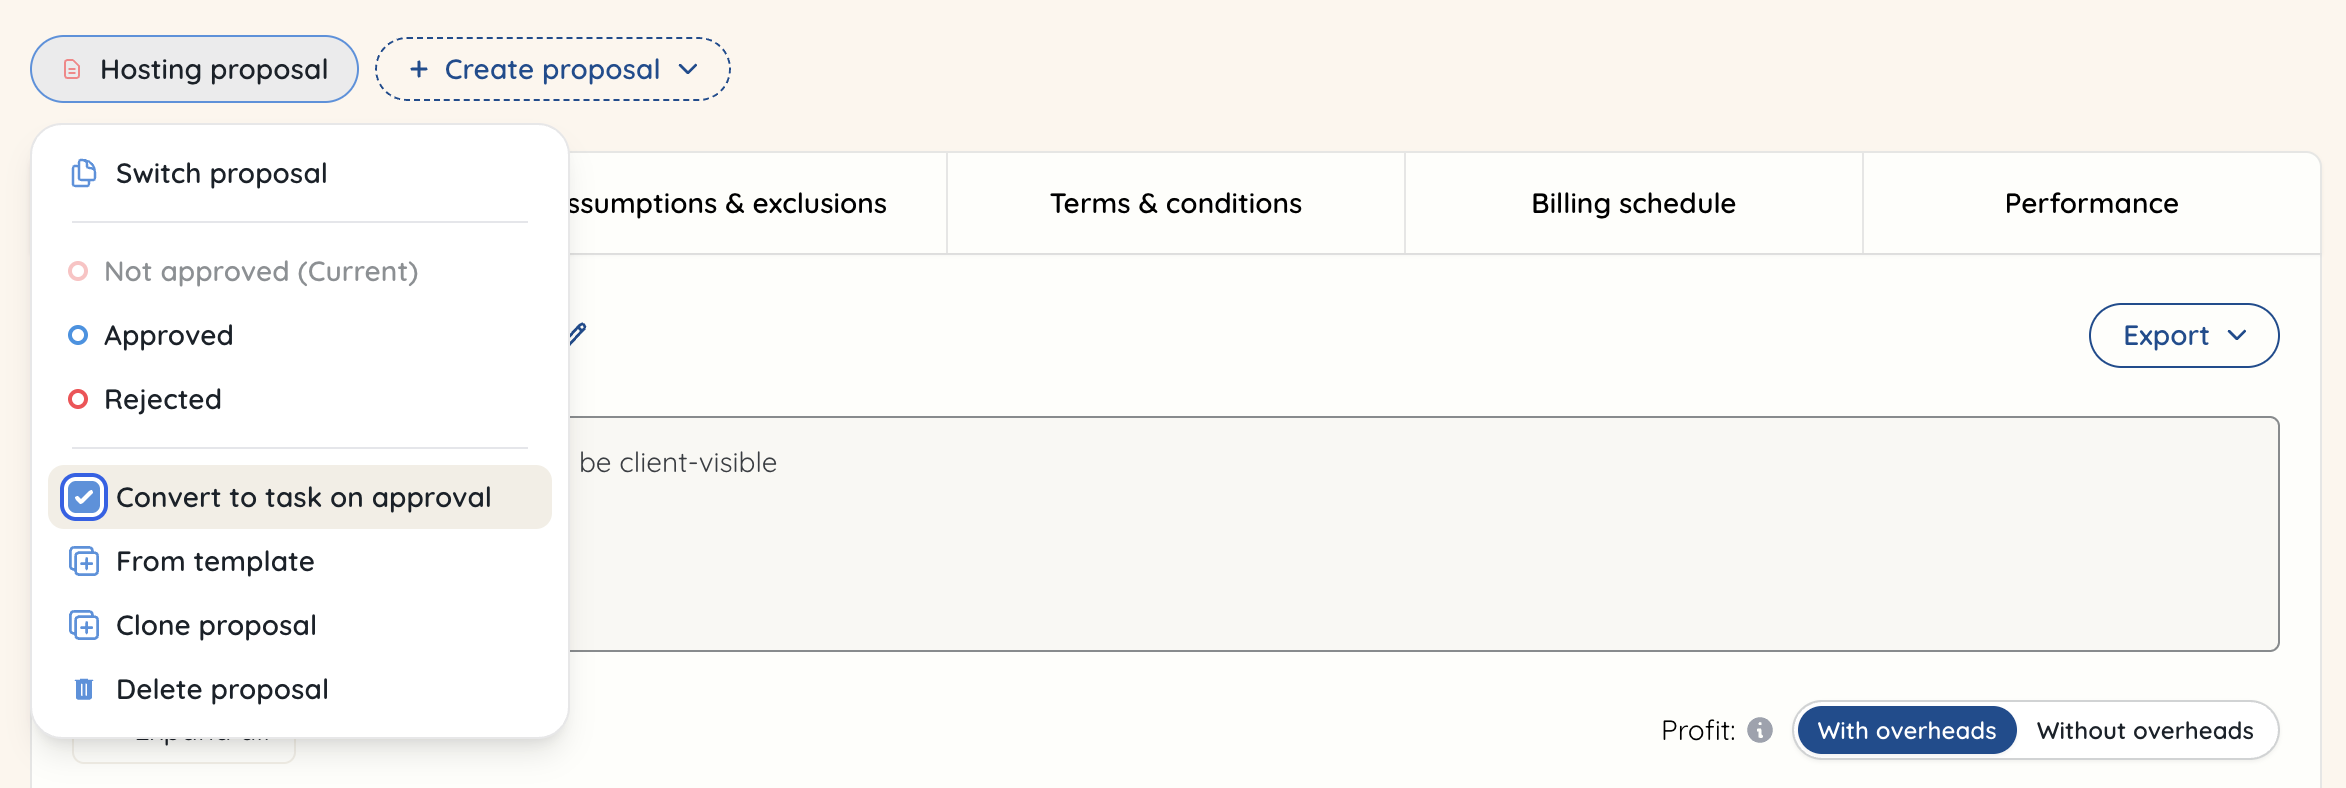
 One final point to make to help you for when (hopefully) the proposal is approved is that there is an option for all deliverables to be converted to tasks upon approval. This means that once the client clicks approve in the proposal, all of the deliverables and line items are automatically converted to tasks in the project, ready for you to start assigning to your team or have them track time for their work on these tasks. You can always easily convert deliverables to tasks even without this button, but it will just take a couple more clicks!
Go to the proposal name and click it to reveal the following dropdown. Now tick the box for 'Convert to task on approval'. Now, if the proposal gets approved, all deliverables and line items can be found in the tasks section of the project.
 If you want to add another proposal to the project, you can go to the right hand side of the proposal name, click ‘+ Create proposal’ and this will bring up the proposal types as a dropdown to select from.
To create a retainer proposal, you select this option in the dropdown.
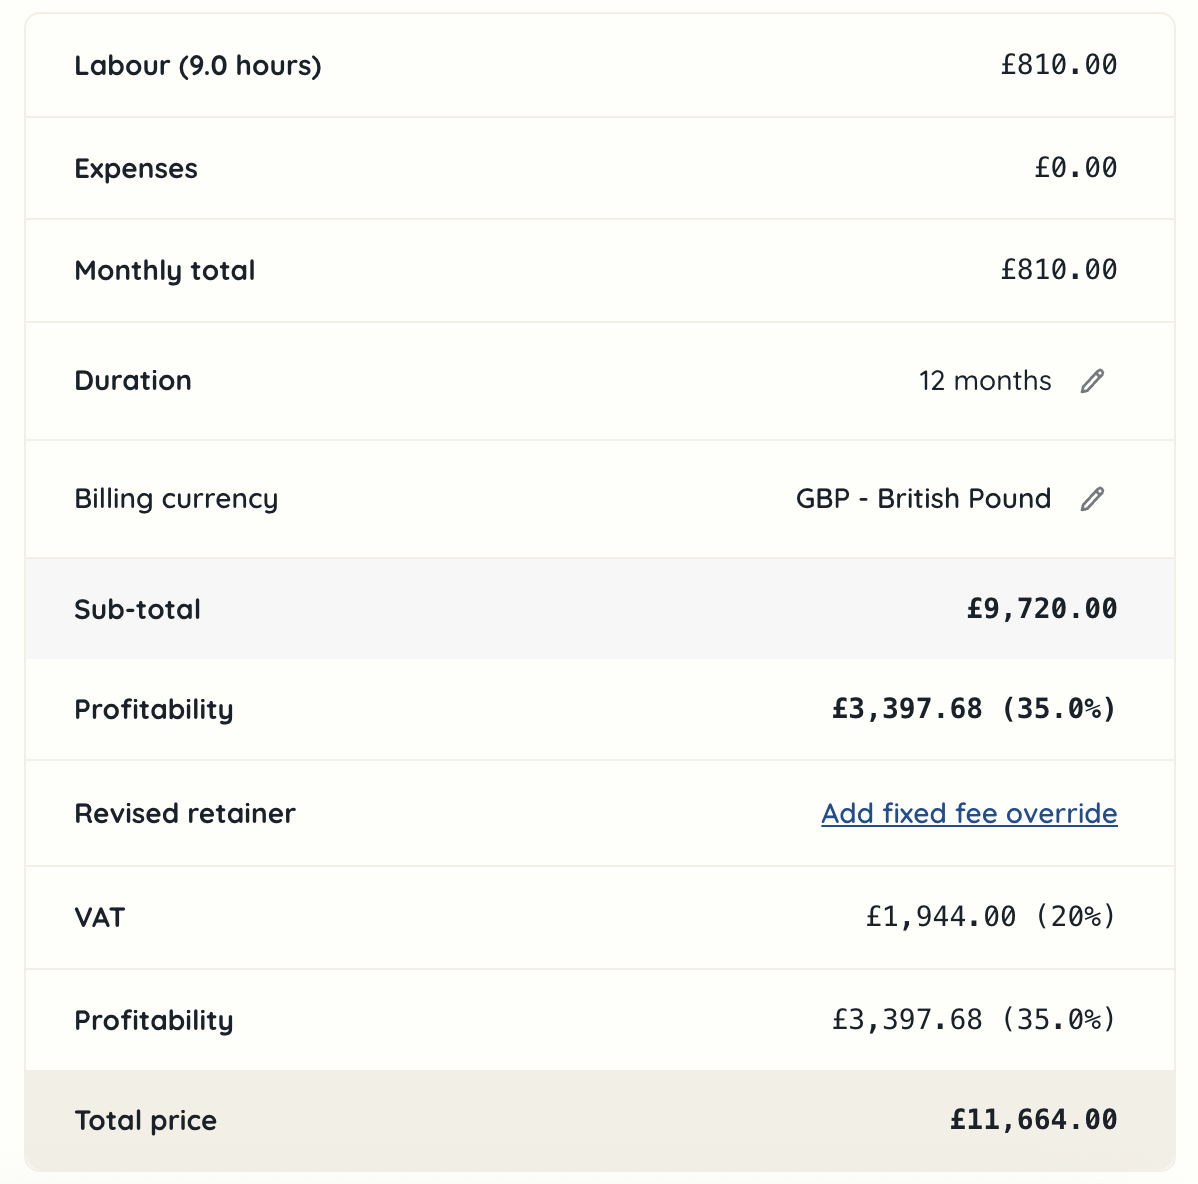
 You need to add your deliverables and line items in the same way as you would for an hour-based proposal set out above. However, in the summary of the costs at the bottom, you can see the monthly total, set a duration and then add a fixed fee override if you wish the monthly figure to be different. You can also see your profitability, to again check you’re happy with the margin you are making. The total price will be the total cost to the client for the duration you selected.
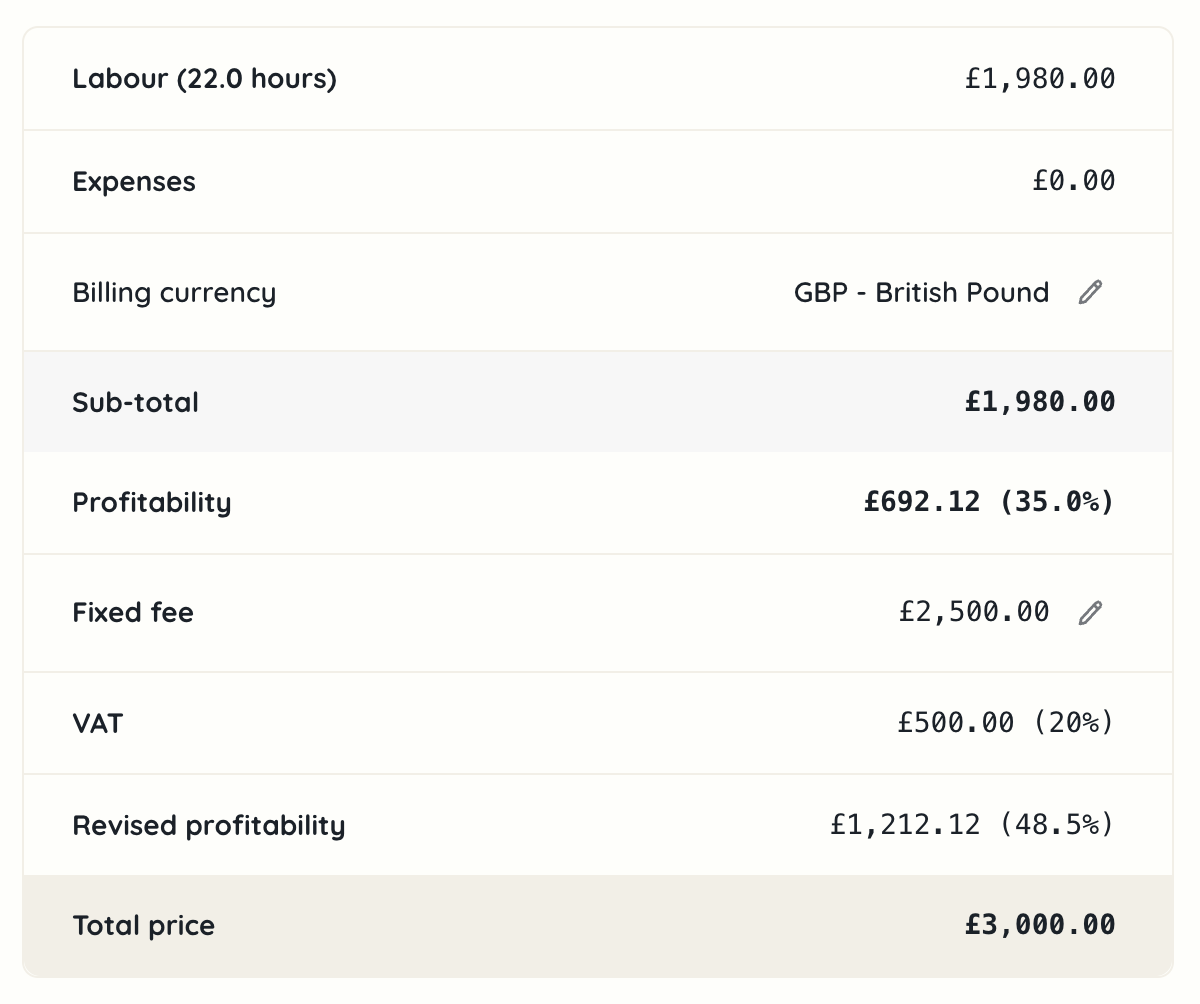
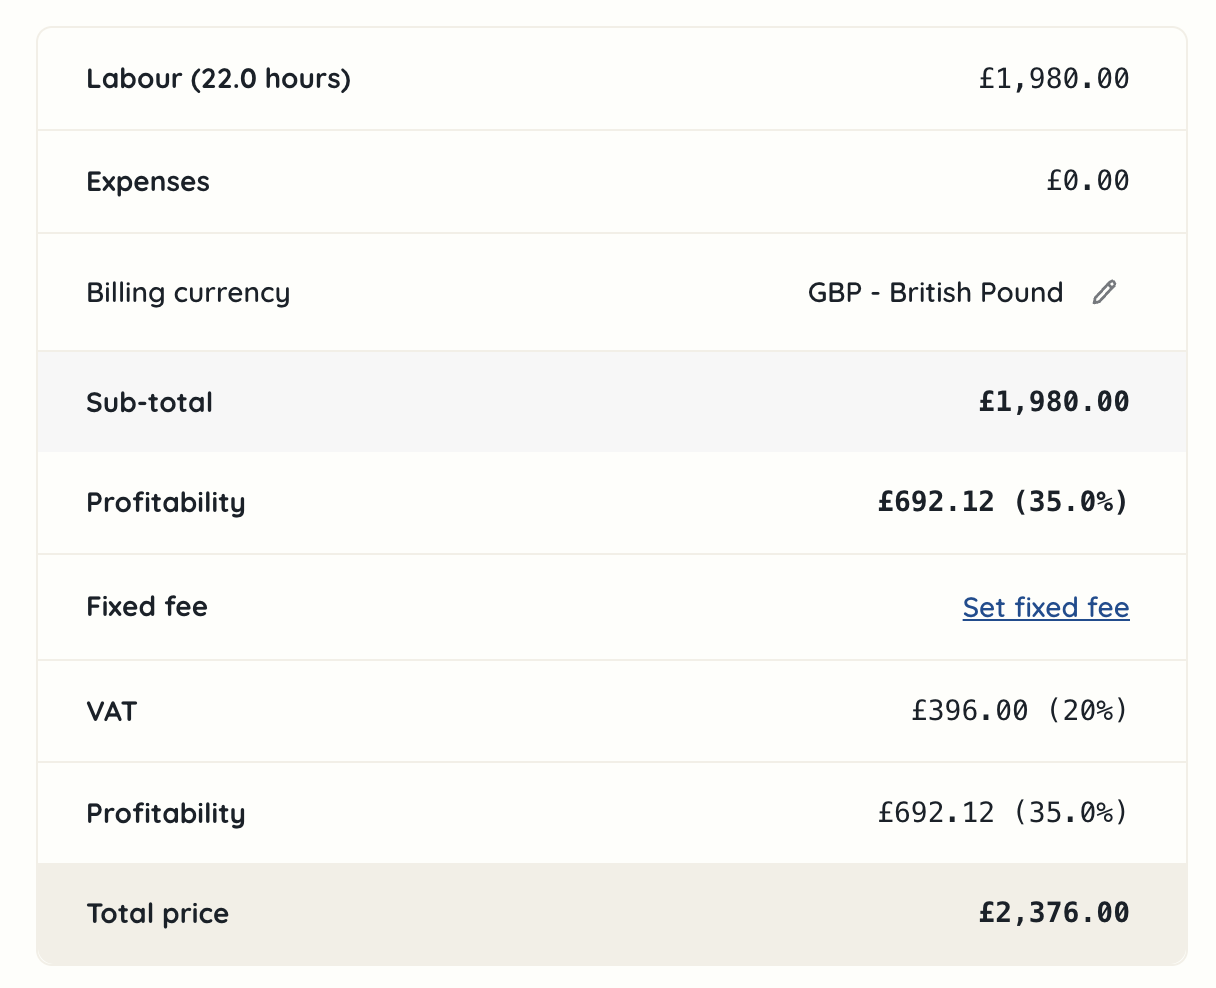
 To create a fixed fee proposal, you again select this option in the dropdown when clicking ‘+ Create new proposal’. Similarly to the other proposal types, you add your deliverables and line items, by picking the resource (rate card) under the labour dropdown. Then at the bottom in the summary of costs, you can set a fixed fee based on the total you've come up with plus an added fee to reflect value delivered, or on the client budget (if stipulated).
 When you click on ‘set fixed fee’, you can choose to pick a figure or percentage. Once you’ve entered the figure, click the tick and the figures will all update.
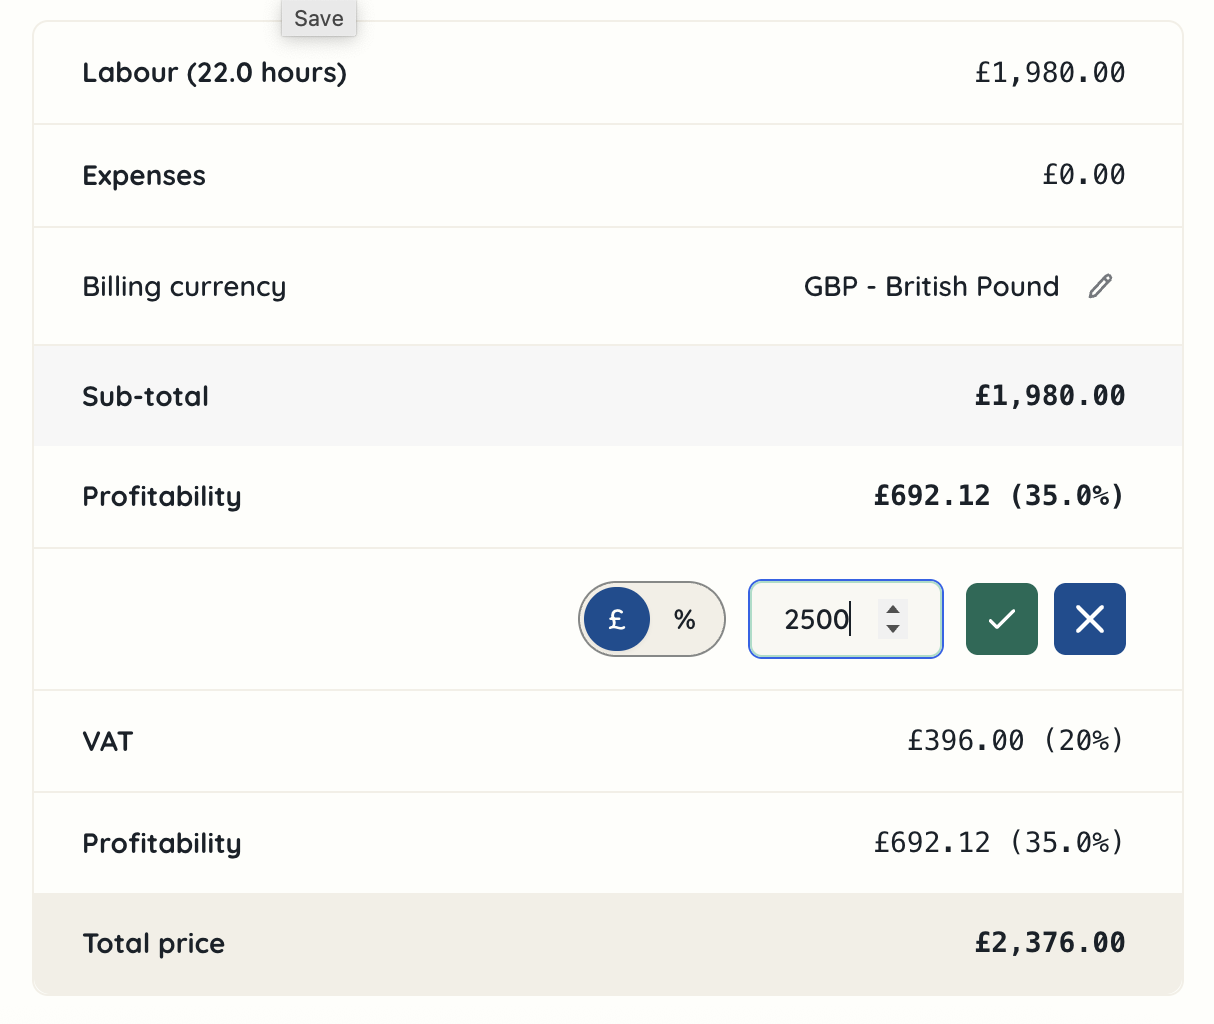 Now you can see your revised profitability. After this, everything else should be followed as above with the assumptions, exclusions, terms and conditions and billing schedule before then sharing it.